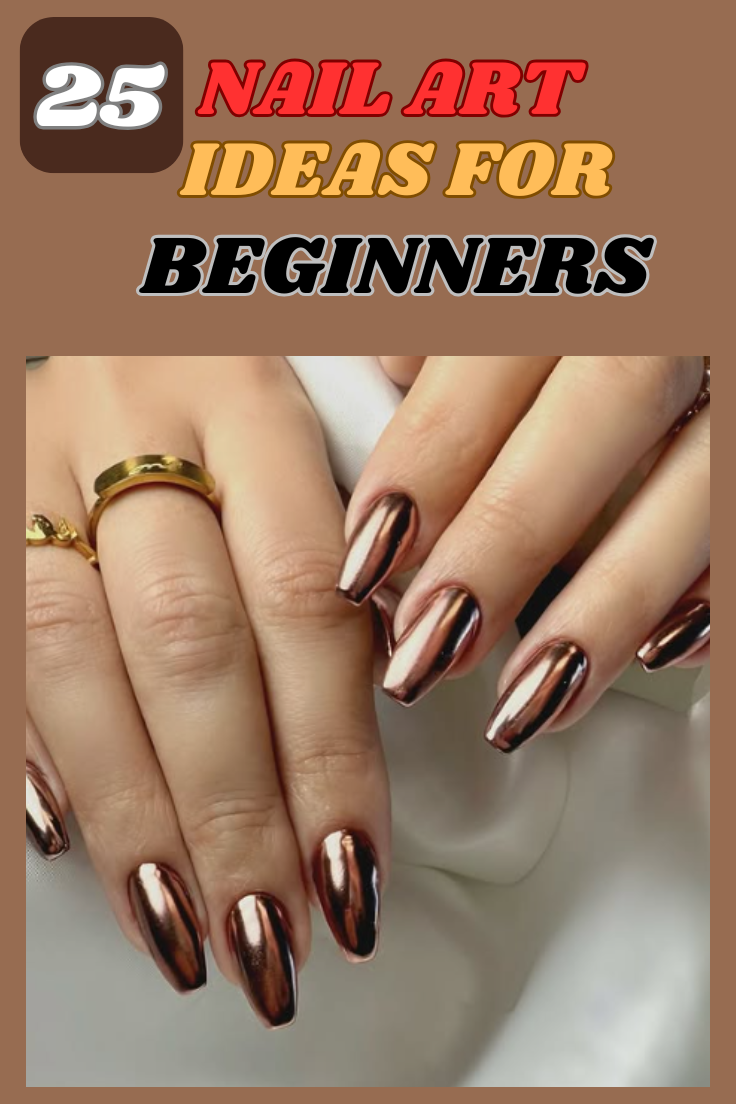
Nail art is one of the easiest ways to express your personality and style, but many people think it’s only for professionals with years of experience. The truth is, even beginners can create stunning nail designs with the right tools, techniques, and a little creativity. Whether you prefer subtle elegance, bold statements, or fun and quirky designs, there’s something for everyone. In this list, you’ll find 25 beginner-friendly nail art ideas that are not only easy to achieve but also look like they were done in a salon. Plus, I’ll recommend some must-have Amazon products that will make your nail art journey even smoother. Get ready to turn your nails into mini masterpieces!
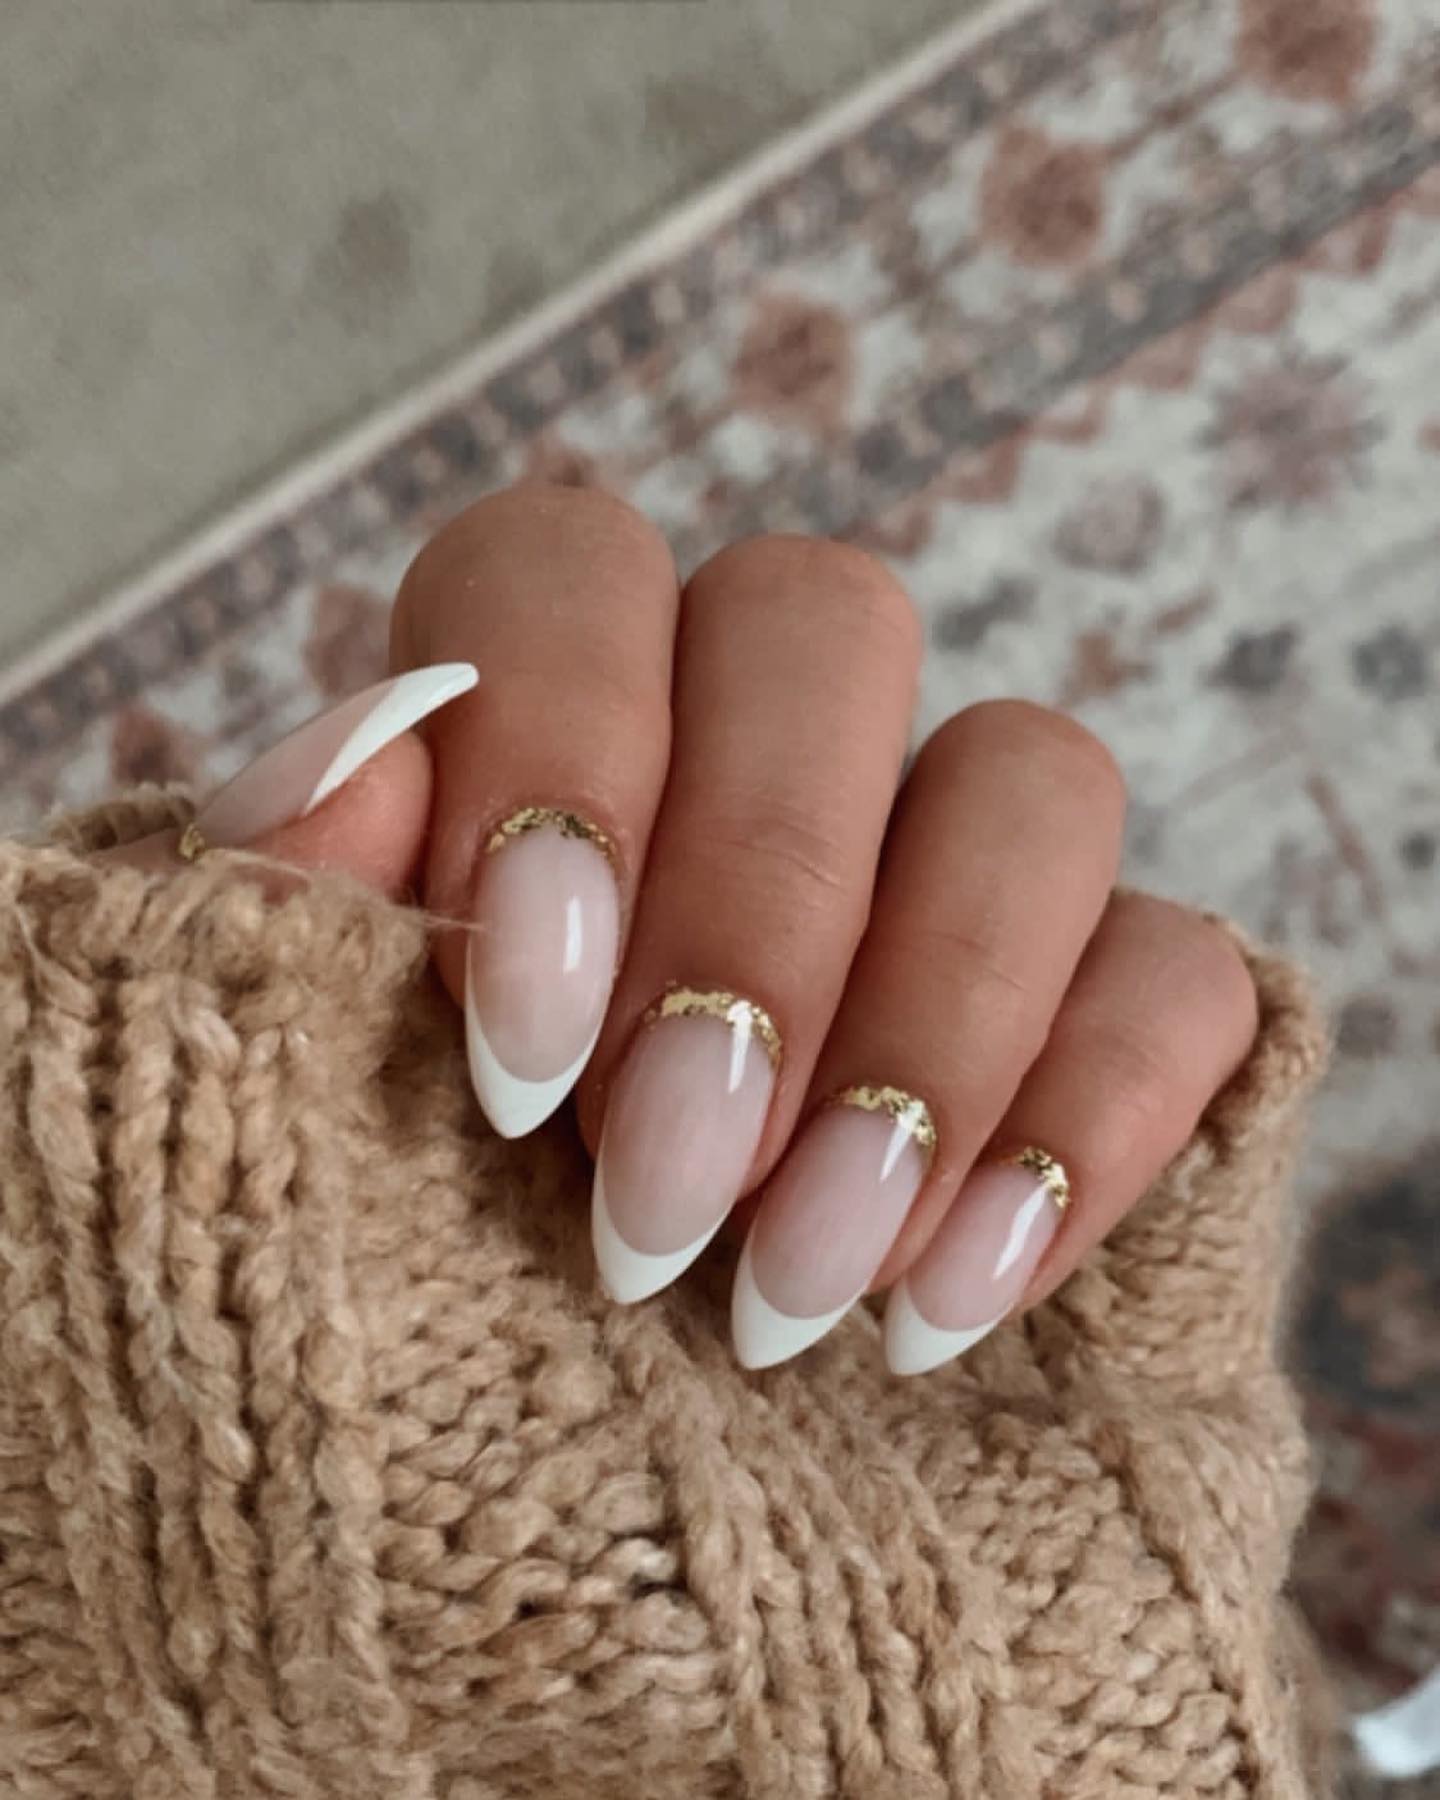
1. Classic French Tips with a Twist

source@nbar.canada
The timeless French manicure never goes out of style, but if you want to spice things up, try giving it a modern twist. Instead of the traditional white tips, experiment with pastel colors, metallic hues, or even neon shades for a bold statement. To get the perfect line, use French tip guides or thin striping tape to create clean edges. If you’re not confident in freehand painting, a French tip stamping kit can make the process foolproof. A quick-drying top coat will help seal your design and keep it looking fresh for days.
2. Minimalist Dot Nails
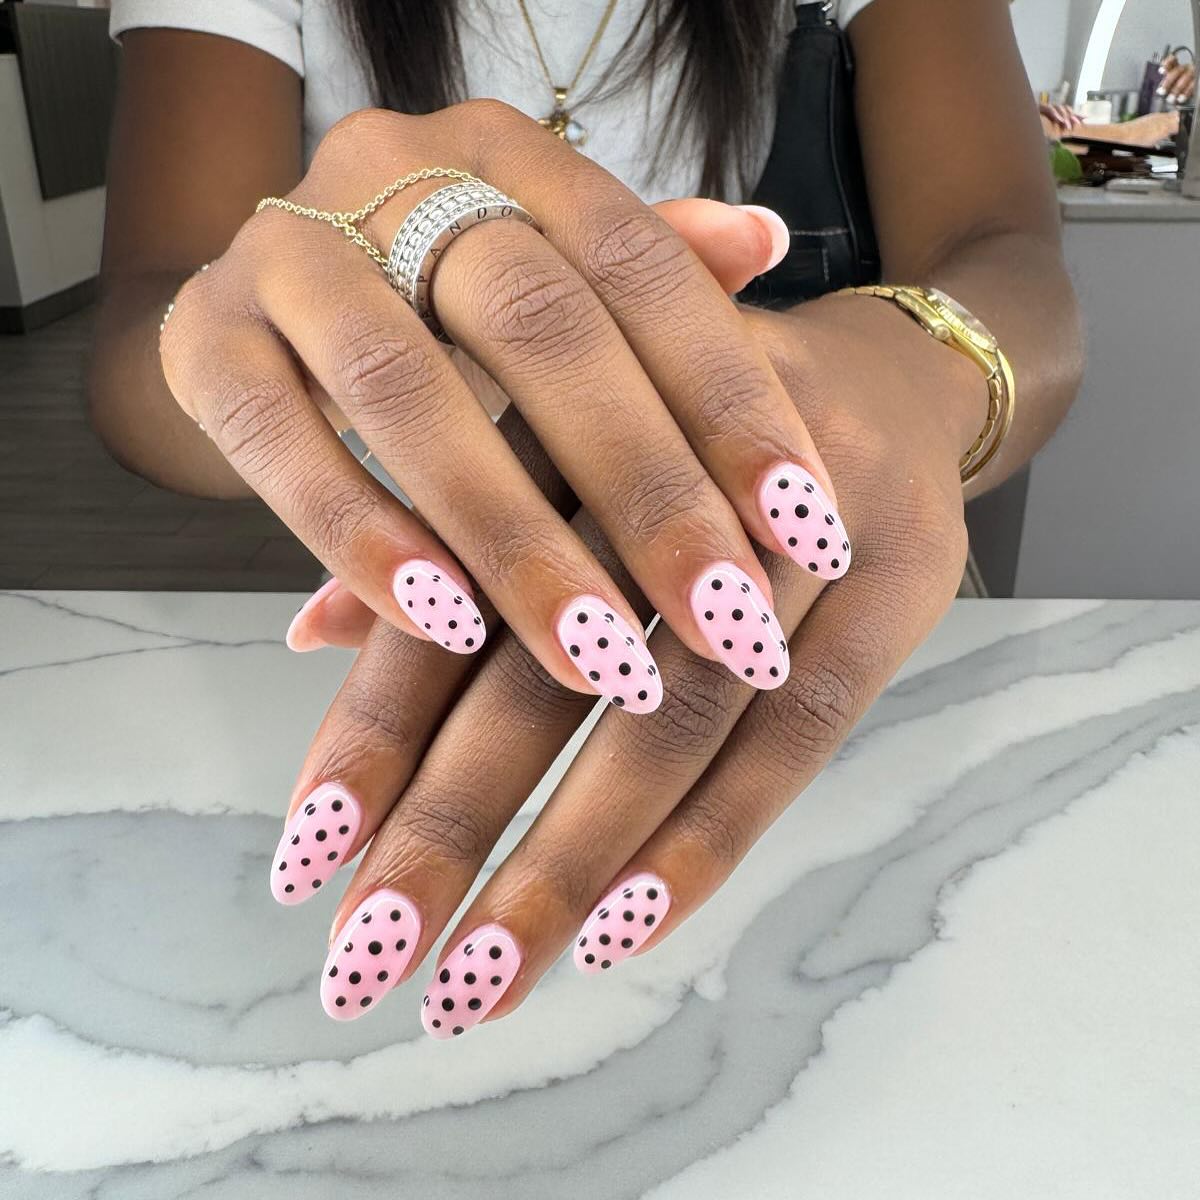
source@dazzlingnailslounge
If you love simple yet chic designs, minimalist dot nails are perfect for you. All you need is a dotting tool or even the end of a bobby pin to create small, evenly spaced dots on a neutral or clear base. You can go for a single dot on each nail for an understated look or arrange dots in patterns like vertical lines, curves, or clusters. Black and white dots create a classic aesthetic, while metallic or pastel shades add a soft, elegant touch. To achieve a salon-quality finish, apply a glossy or matte top coat to lock in your design.
3. Glitter Accent Nails
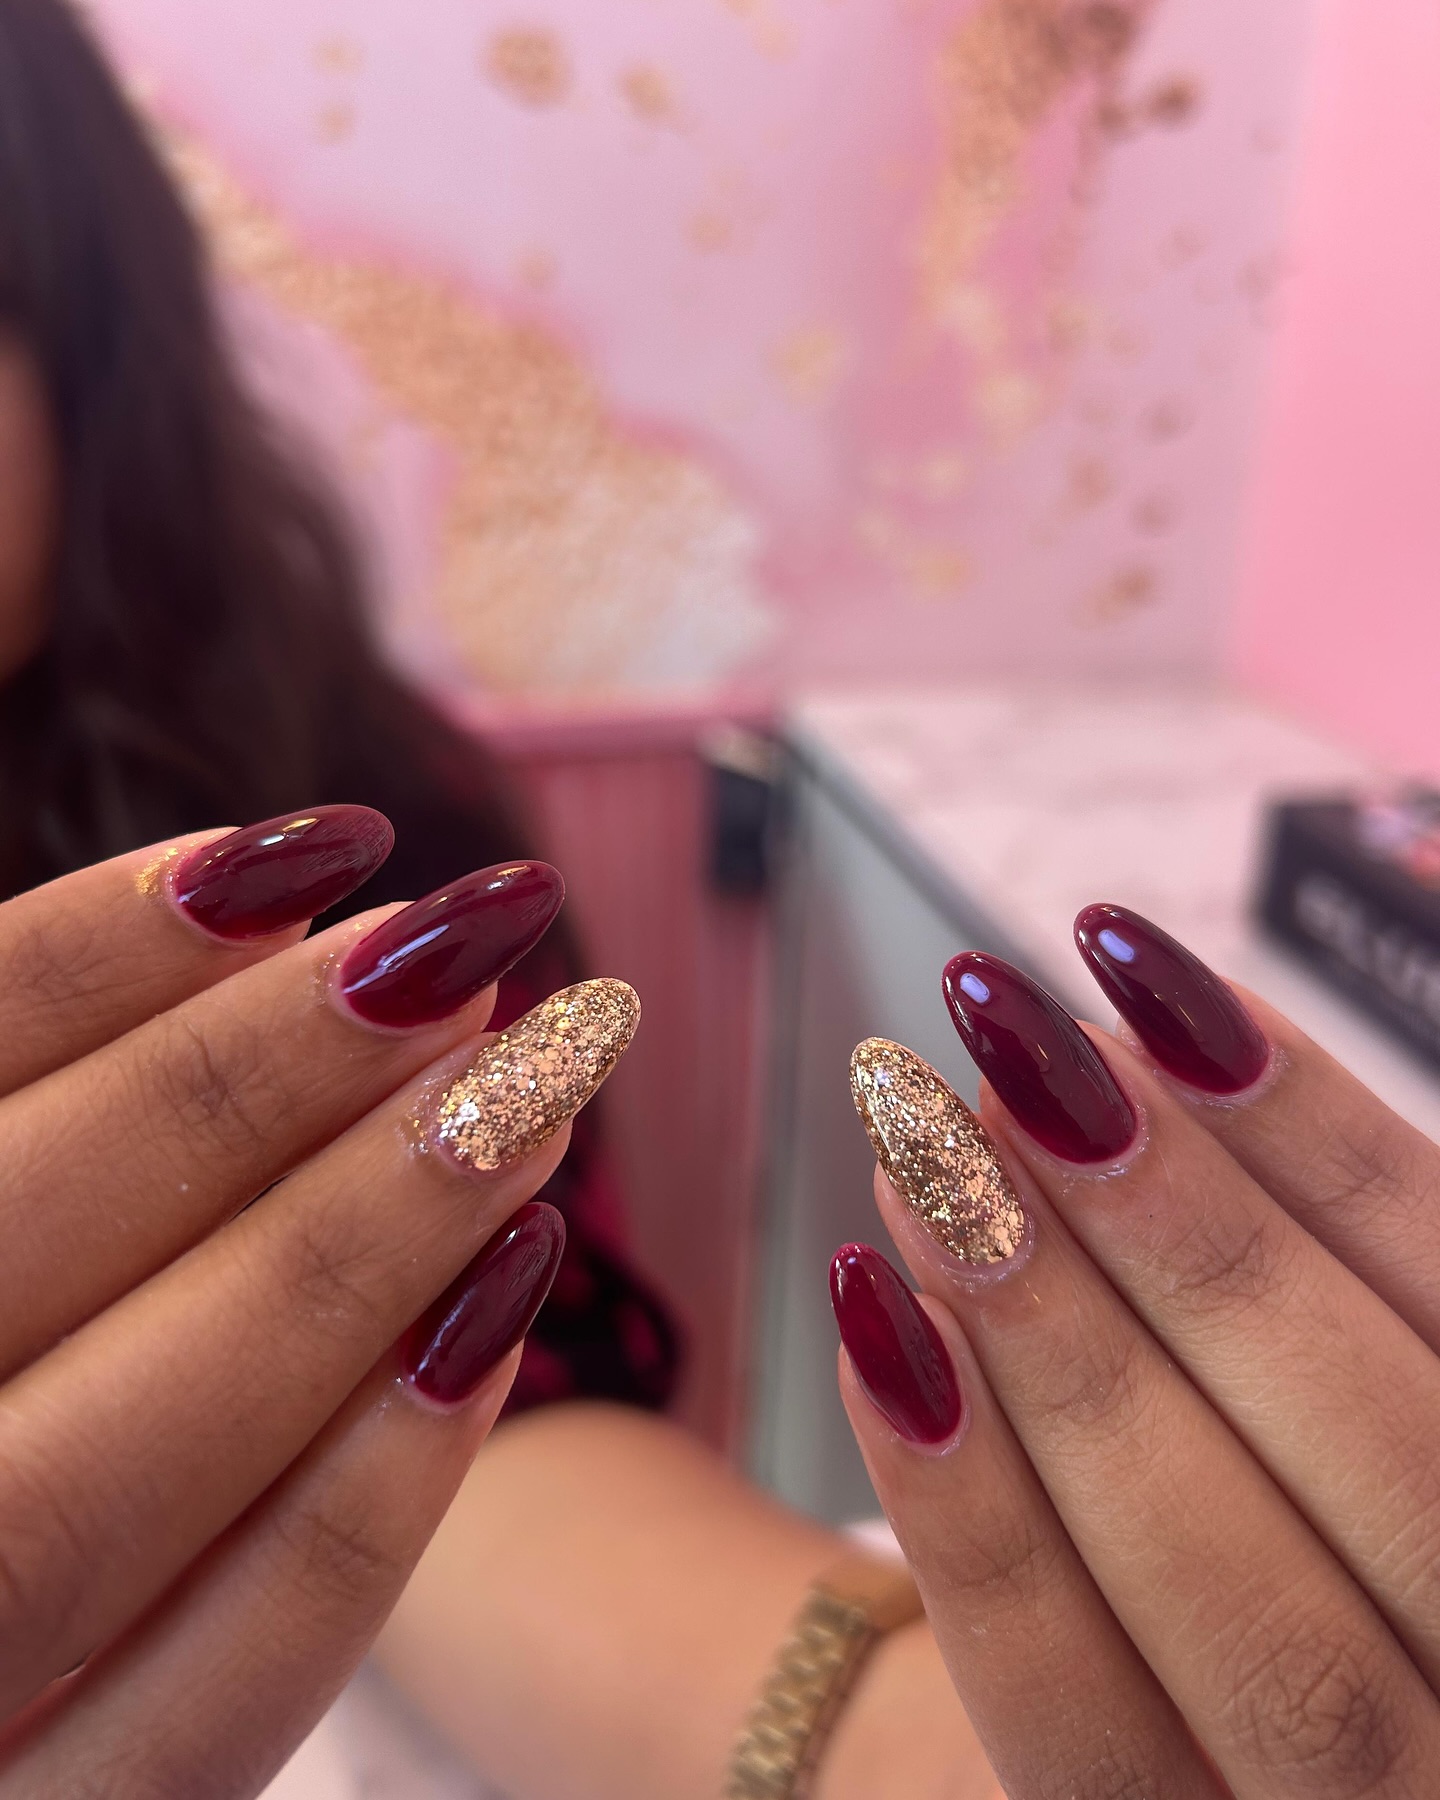
source@nailvana_nail_studio
Adding a touch of sparkle to your nails is one of the easiest ways to elevate your manicure with minimal effort. Instead of covering all your nails in glitter, apply glitter polish to just one or two nails per hand for a trendy accent. You can also use a sponge to create a glitter gradient effect, concentrating the glitter at the tips or base of the nail and fading it out. For extra precision, use fine glitter dust or loose sequins applied with a clear top coat. A peel-off base coat is a great investment if you love glitter nails but hate the removal process.
4. Ombre Nails with a Sponge
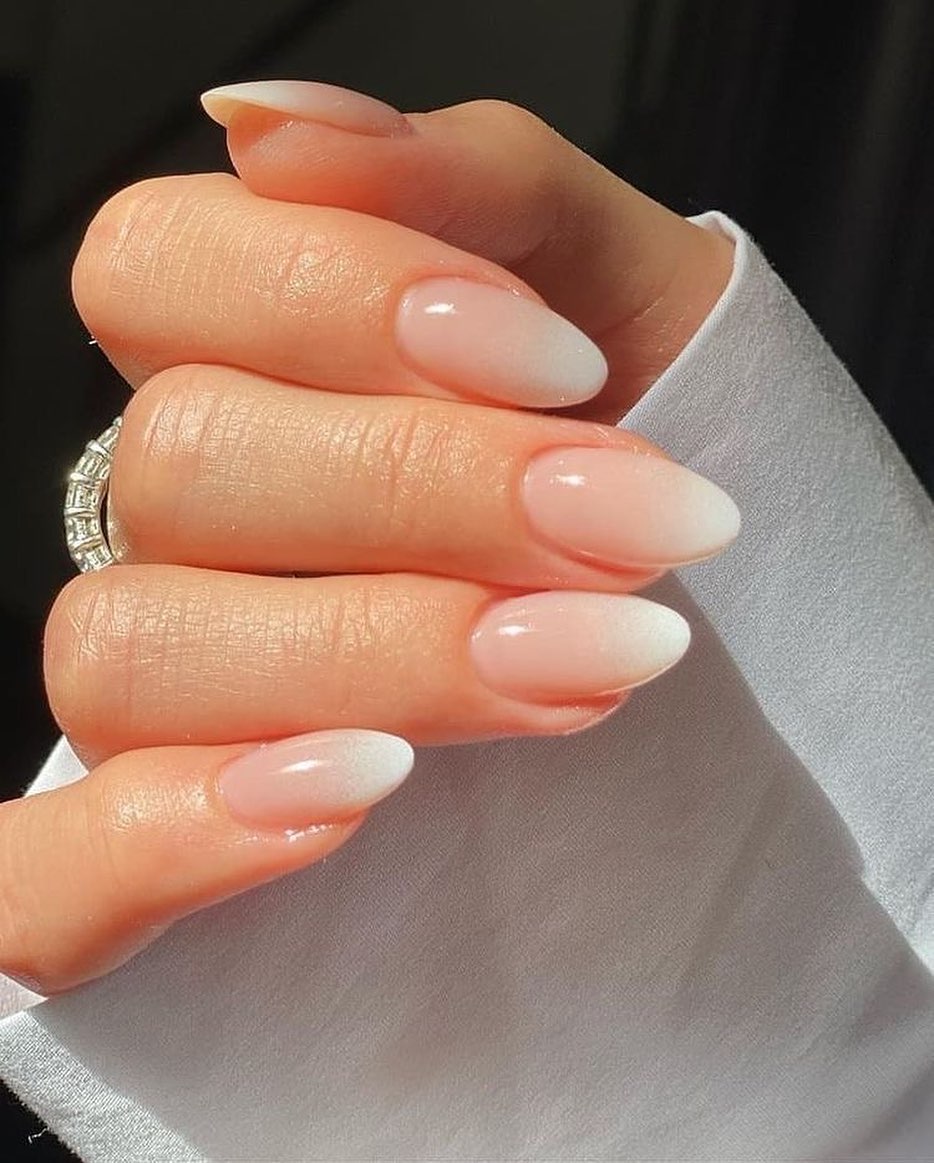
source@bloombarnails
Ombre nails look sophisticated, but they’re surprisingly easy to achieve at home. All you need is a makeup sponge, two or more complementing nail polish shades, and a little patience. Start by painting a base color on your nails, then apply the gradient colors onto the sponge and dab it onto your nails in layers. You can create soft pastel blends, sunset-inspired fades, or even a dramatic dark-to-light effect. A good blending brush or a smudge-proof top coat will help smooth out the transition and give your ombre nails a flawless finish.
5. Striped Nail Art with Tape
source@jmoneynails
Straight, clean stripes may seem challenging, but nail striping tape makes it effortless. Simply apply the tape in the desired pattern over a dried base coat and paint over it with a contrasting color. Once the polish is dry, carefully remove the tape to reveal crisp, sleek lines. You can experiment with diagonal stripes, vertical accents, or even zigzag patterns. Metallic striping tape also works as a design element on its own, adding a luxe touch to any manicure.
6. Pastel Rainbow Nails
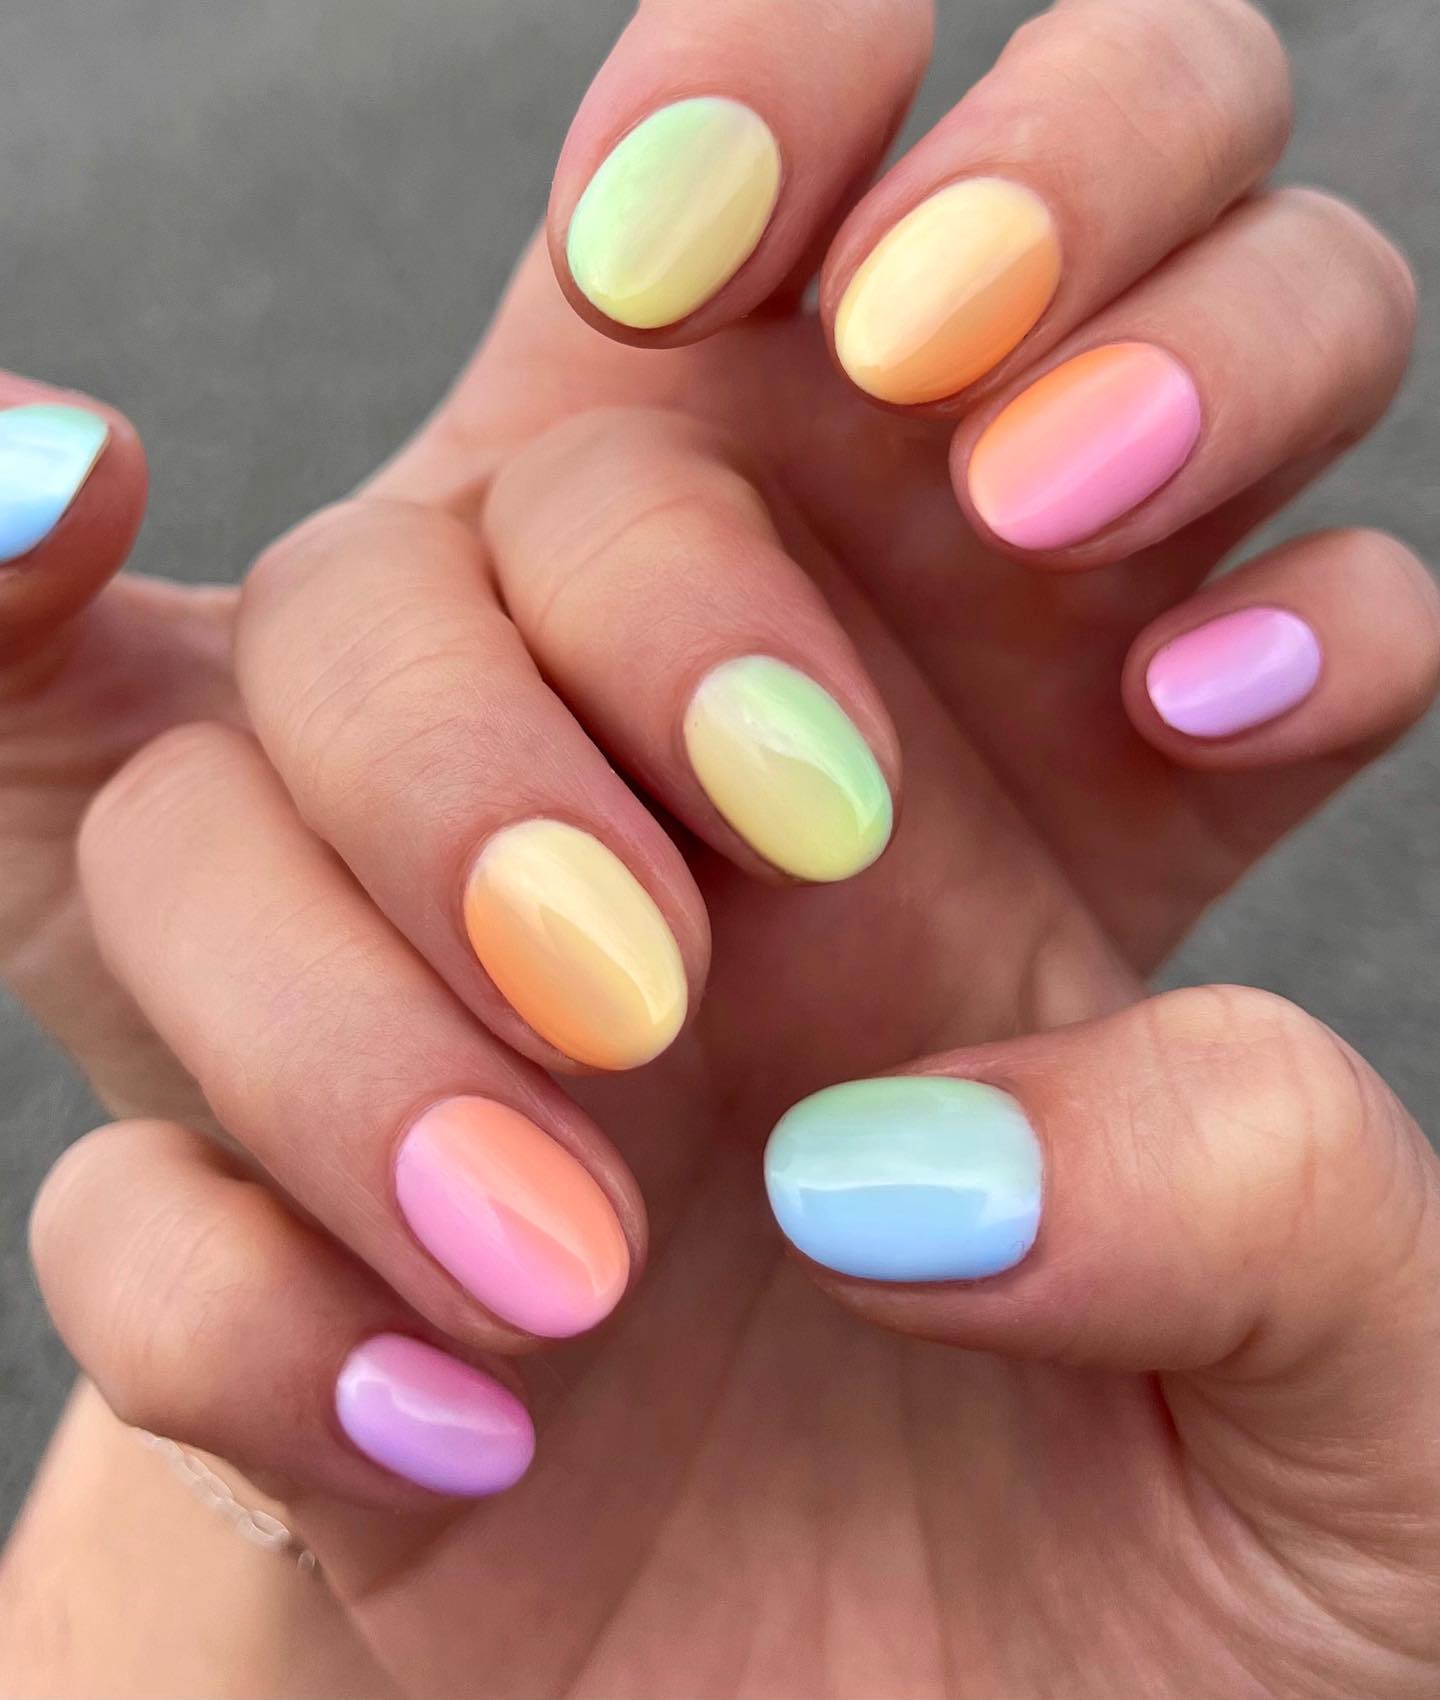
source@peachinails
For a playful and colorful look, try pastel rainbow nails. Instead of painting all your nails one color, use a different pastel shade on each nail to create a soft rainbow effect. Shades like lavender, baby pink, mint green, and sky blue work beautifully together. This design is perfect for spring and summer, adding a cheerful and fresh vibe to your look. A glossy top coat enhances the pastel hues, making your nails look professionally done with minimal effort.
7. Negative Space Nail Design
source@beachgirlmani
Negative space nail art embraces the natural nail as part of the design, creating a unique and modern aesthetic. You can achieve this by using striping tape, stickers, or freehand painting techniques. Leave sections of your nails unpainted or use a clear polish as a base to highlight geometric shapes, half-moons, or abstract designs. This style not only looks trendy but also extends the life of your manicure since regrowth is less noticeable.
8. Easy Floral Nail Art
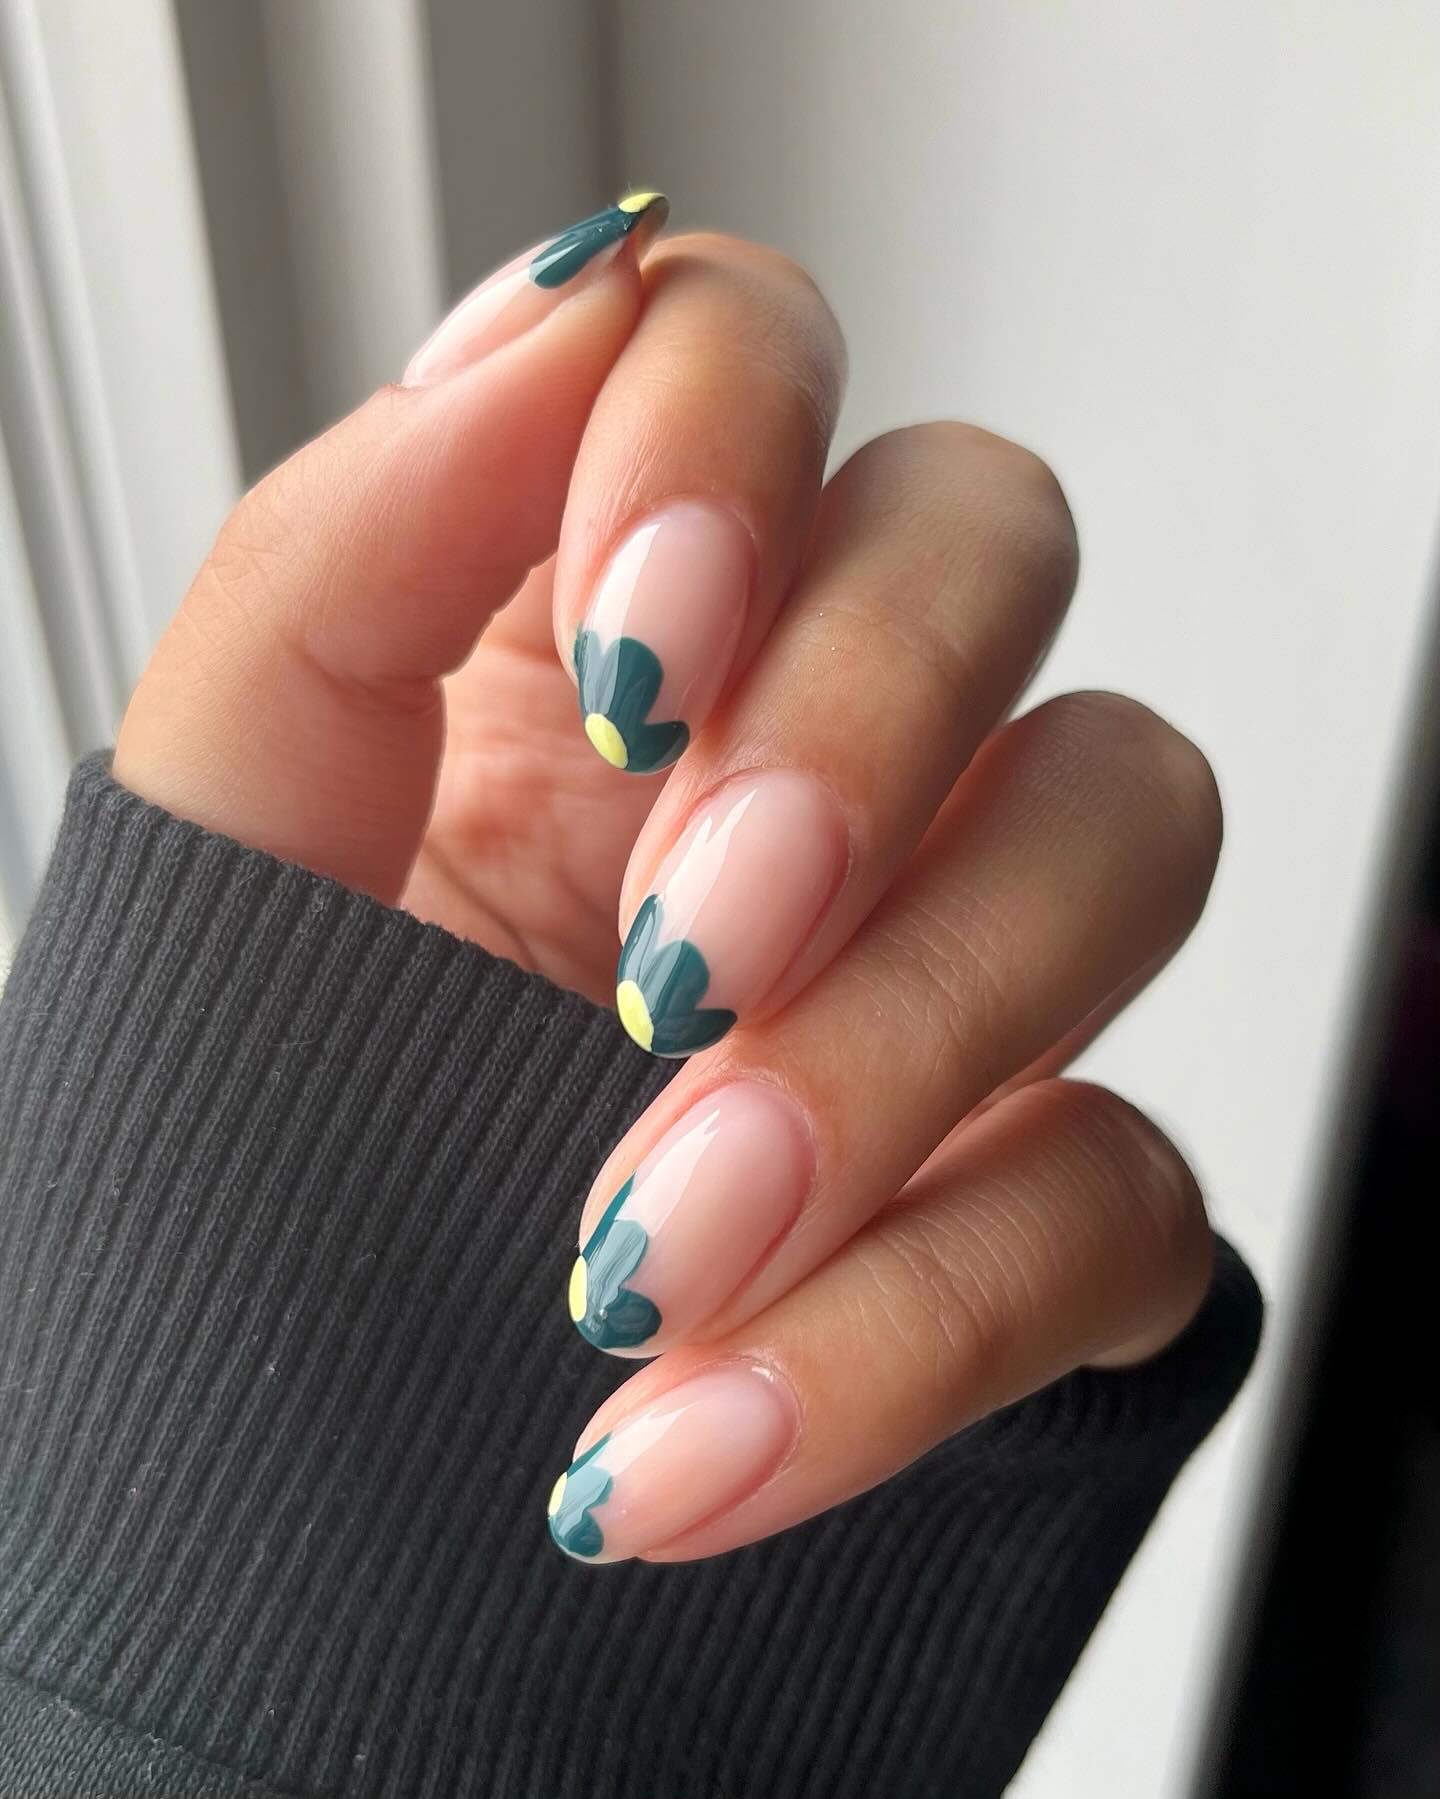
source@aanchysnails
Florals are a classic in nail art, and you don’t need to be a pro to achieve them. A dotting tool or the tip of a toothpick is all you need to create delicate flower petals. Choose a light base color, then use small dots to form a flower shape. Add a contrasting color in the center of each flower for extra detail. This design looks lovely with pastels for a soft aesthetic or bold colors for a vibrant pop.
9. Marble Effect Using Water
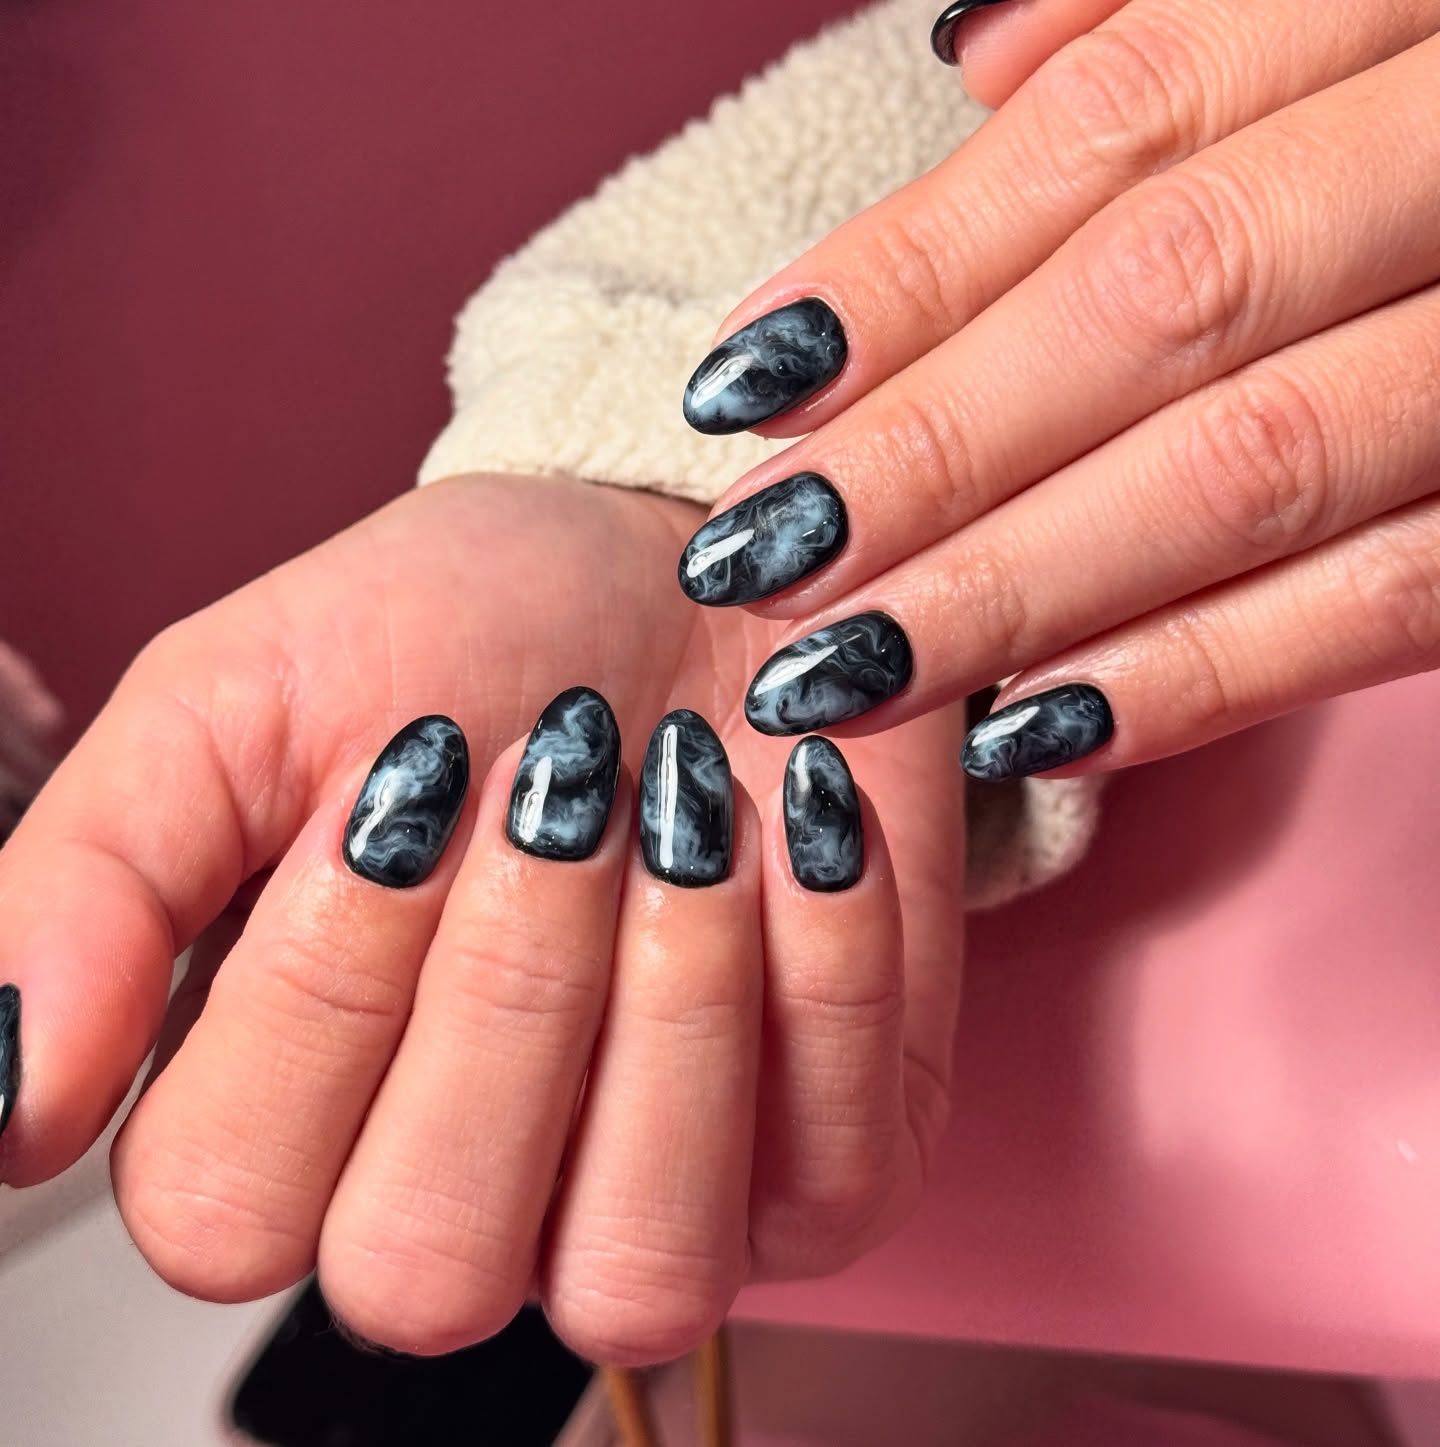
source@naior_b
Marble nails may look intricate, but they are surprisingly simple with the right technique. Fill a small bowl with water, drop in different shades of nail polish, and use a toothpick to swirl the colors. Dip your nails into the mixture for a mesmerizing marbleized effect. Using a liquid latex barrier around your nails can make cleanup easier. Black, white, and gray create a classic marble effect, while blues and purples offer a more artistic vibe.
10. Metallic Chrome Nails
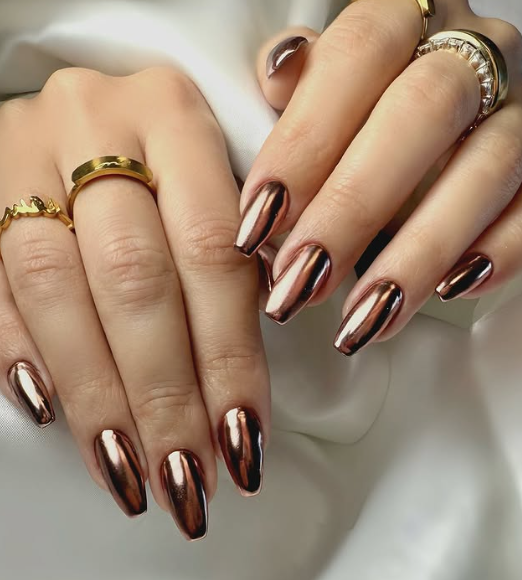
source@beyond_nails_studio
For an ultra-modern and high-shine look, metallic chrome nails are a must-try. Chrome nail powders give an intense reflective effect, transforming a regular manicure into a mirror-like finish. Apply the powder over a gel or regular polish base and seal it with a no-wipe top coat. Silver, gold, rose gold, and even holographic chrome shades can instantly make your nails look edgy and futuristic
11. Press-On Nails for Instant Glam
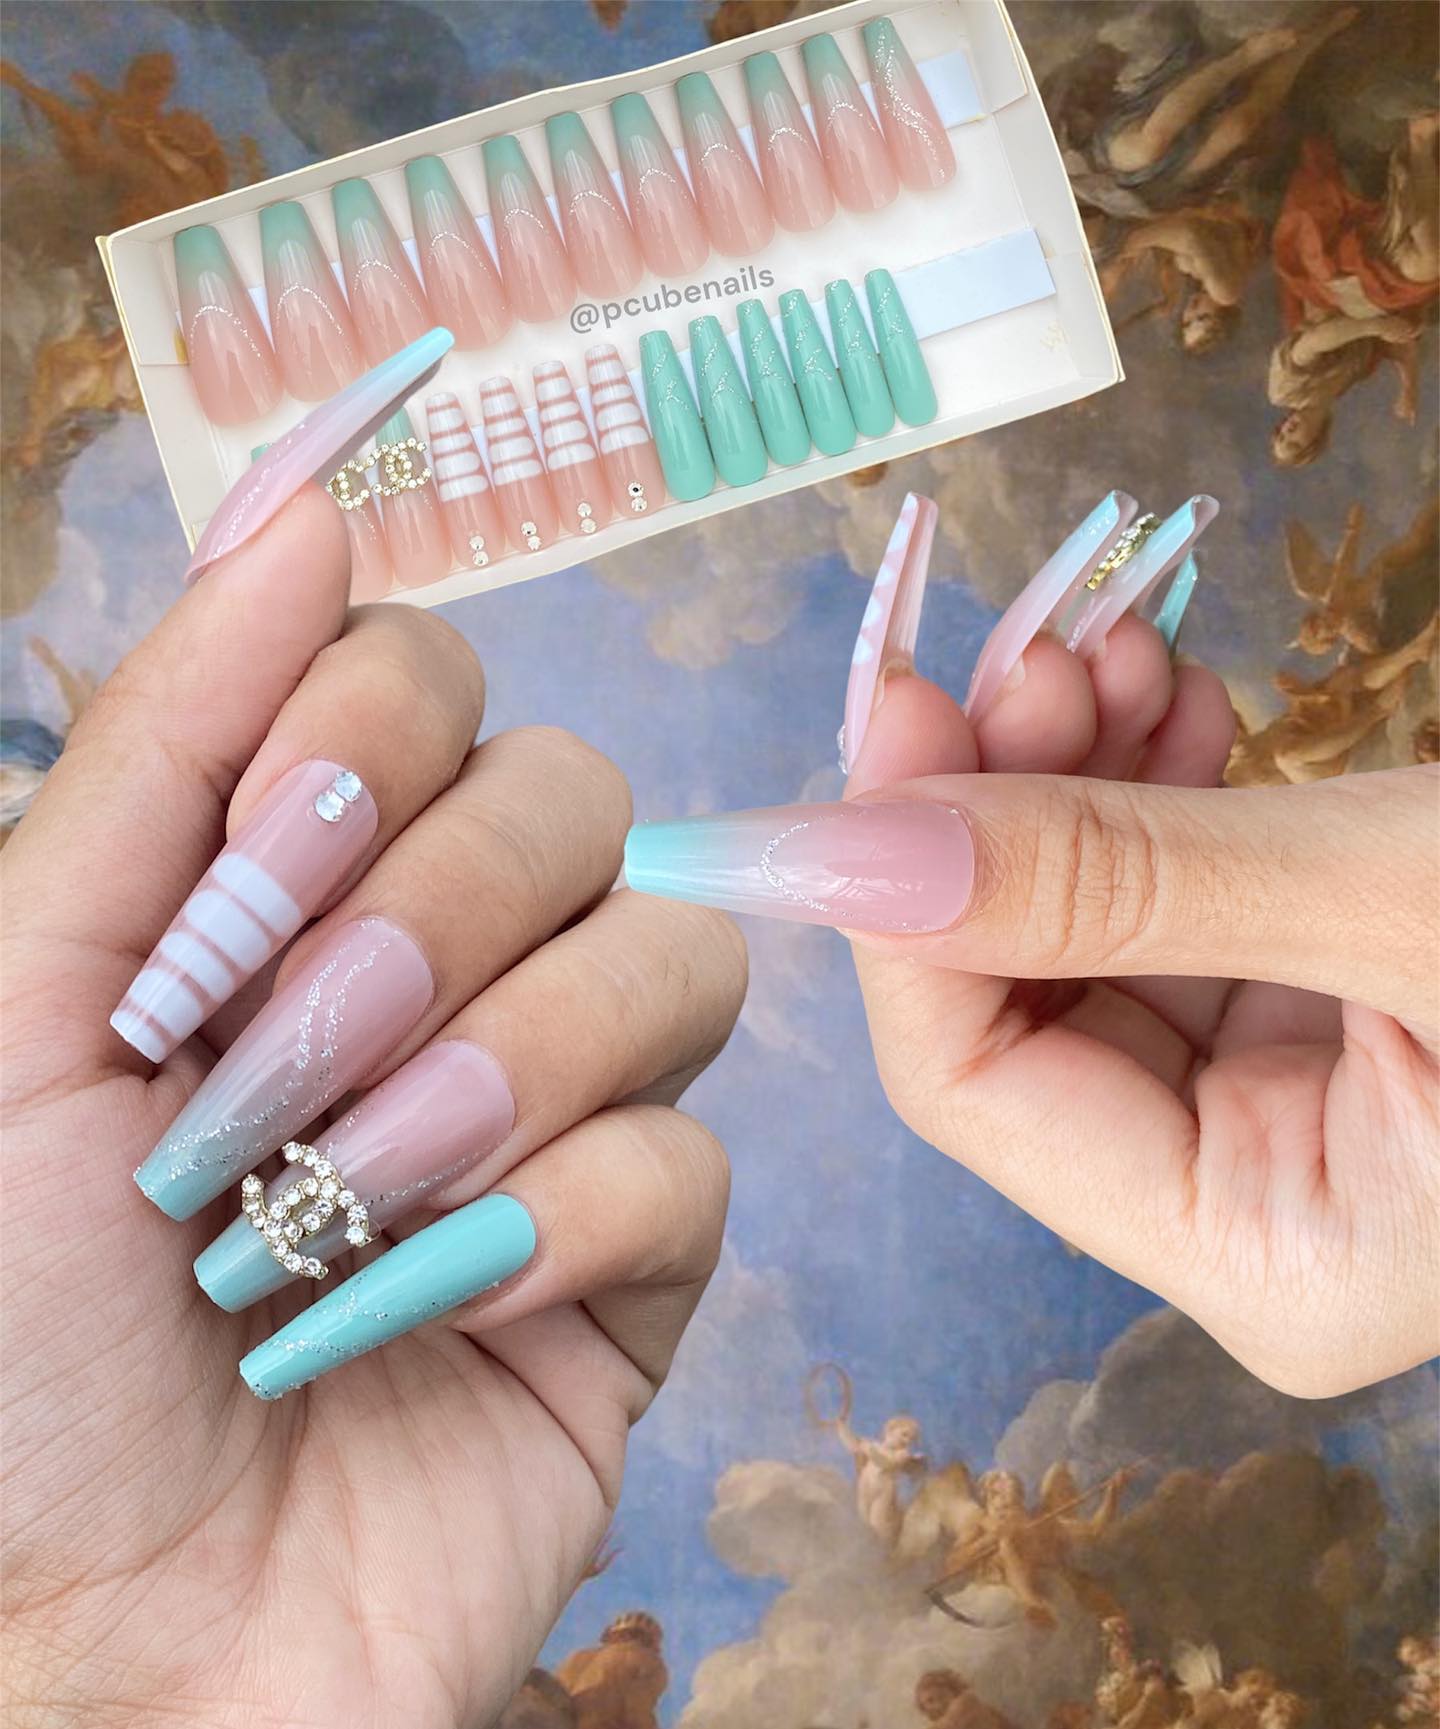
source@pcubenails
If painting your nails isn’t your thing, press-on nails are a fantastic alternative. They have come a long way from the old-school versions and now offer salon-quality looks without the hefty price tag. Available in various shapes, lengths, and designs, press-ons can give you anything from a simple nude manicure to intricate nail art in minutes. Simply apply the adhesive tabs or nail glue, press them onto your nails, and you’re ready to go. They’re perfect for special occasions or when you want a quick, flawless manicure without the hassle. Plus, they’re reusable, making them a cost-effective option for nail art lovers.
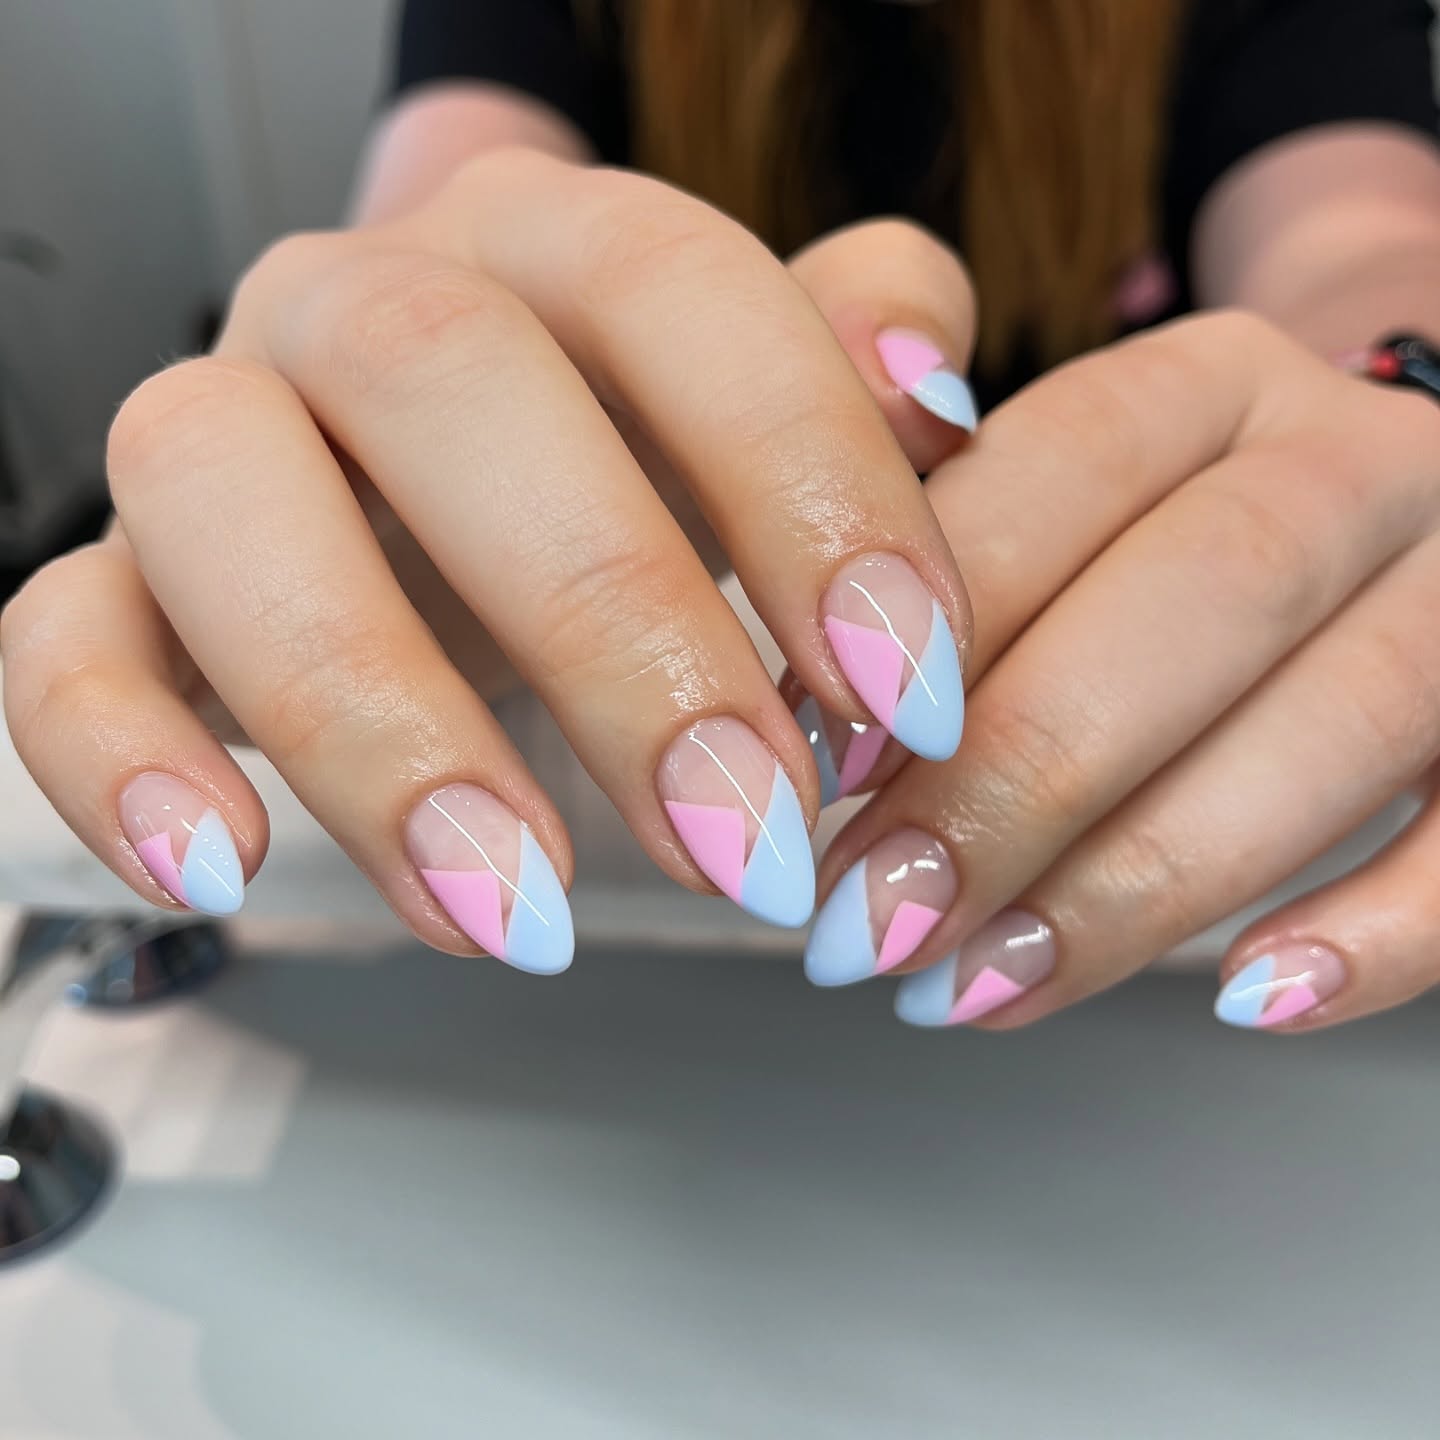
12. Simple Geometric Nail Art
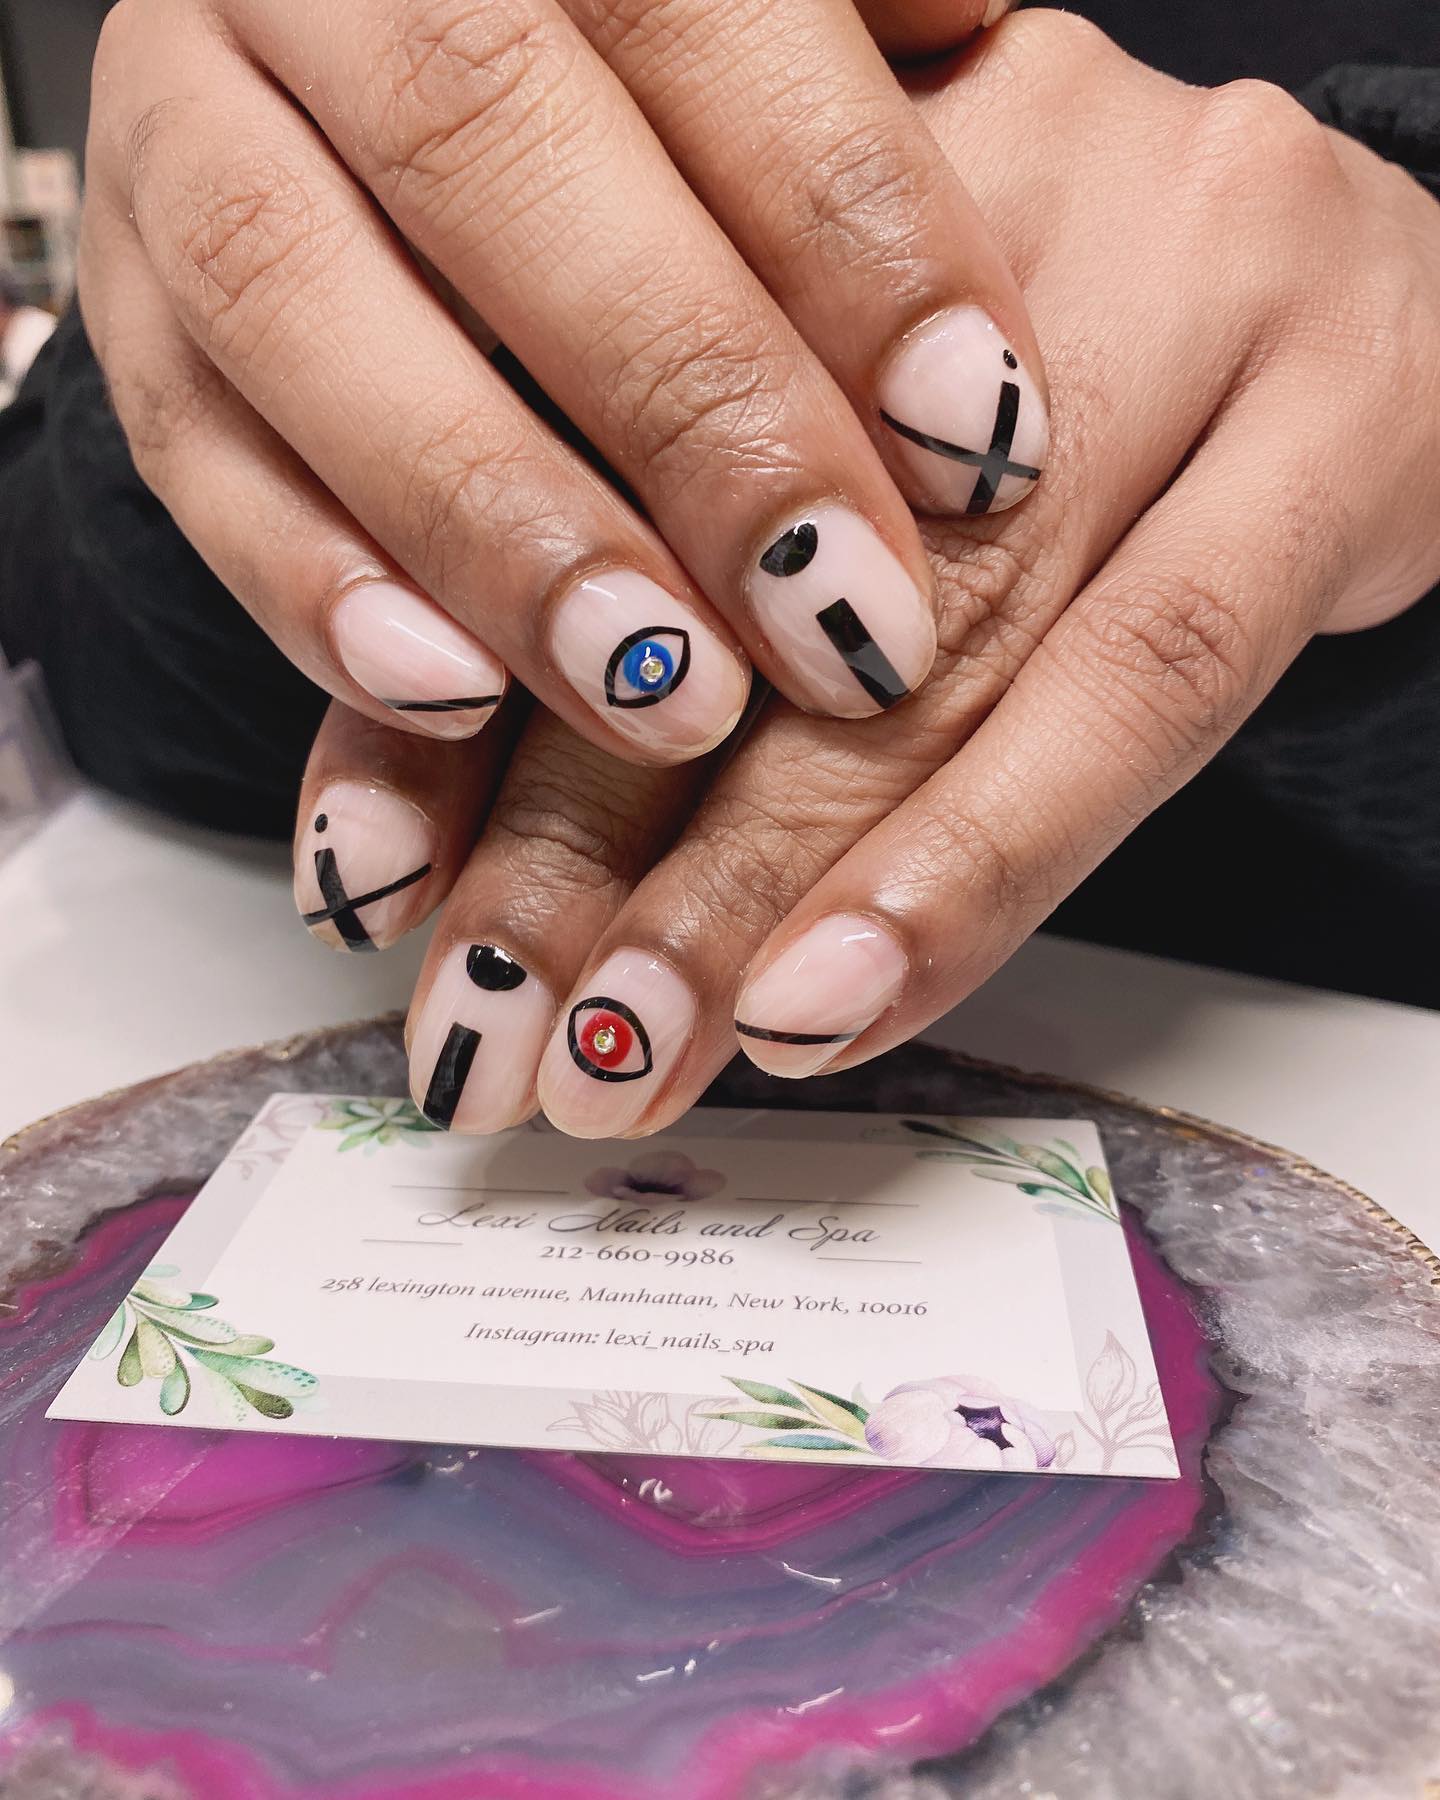
source@lexi_nails_spa
Geometric designs add a modern, sophisticated edge to your nails, and they’re surprisingly easy to create. Using thin nail tape, you can section off different areas of your nails and paint them in contrasting colors to form triangles, squares, or abstract shapes. Another beginner-friendly technique is freehanding lines with a fine nail art brush. Geometric designs work well with monochrome shades for a chic look or bright colors for a bold, eye-catching effect.
13. Sheer Nude with Gold Foil
source@le_dore.nails
For a luxurious and effortlessly elegant manicure, try sheer nude nails with delicate gold foil accents. The barely-there nude base keeps the look subtle, while small pieces of gold foil add a touch of sophistication. You can randomly place the foil pieces for an abstract effect or concentrate them at the tips for a gilded French manicure. A glossy top coat ensures your foil stays in place while adding a beautiful shine. This design is perfect for both everyday wear and special occasions.
14. Matte Top Coat Magic
source@mooncat
A matte top coat is a game-changer if you want to transform your regular glossy polish into something more sophisticated. With just one coat, you can achieve a velvety, soft finish that gives your manicure an instant high-fashion upgrade. Matte nails look stunning in deep shades like burgundy, navy, and forest green, but they also work well with pastels and nudes for a minimalist aesthetic. Experiment with a mix of matte and glossy finishes on different nails for an even more striking effect.
15. Color Block Nail Design
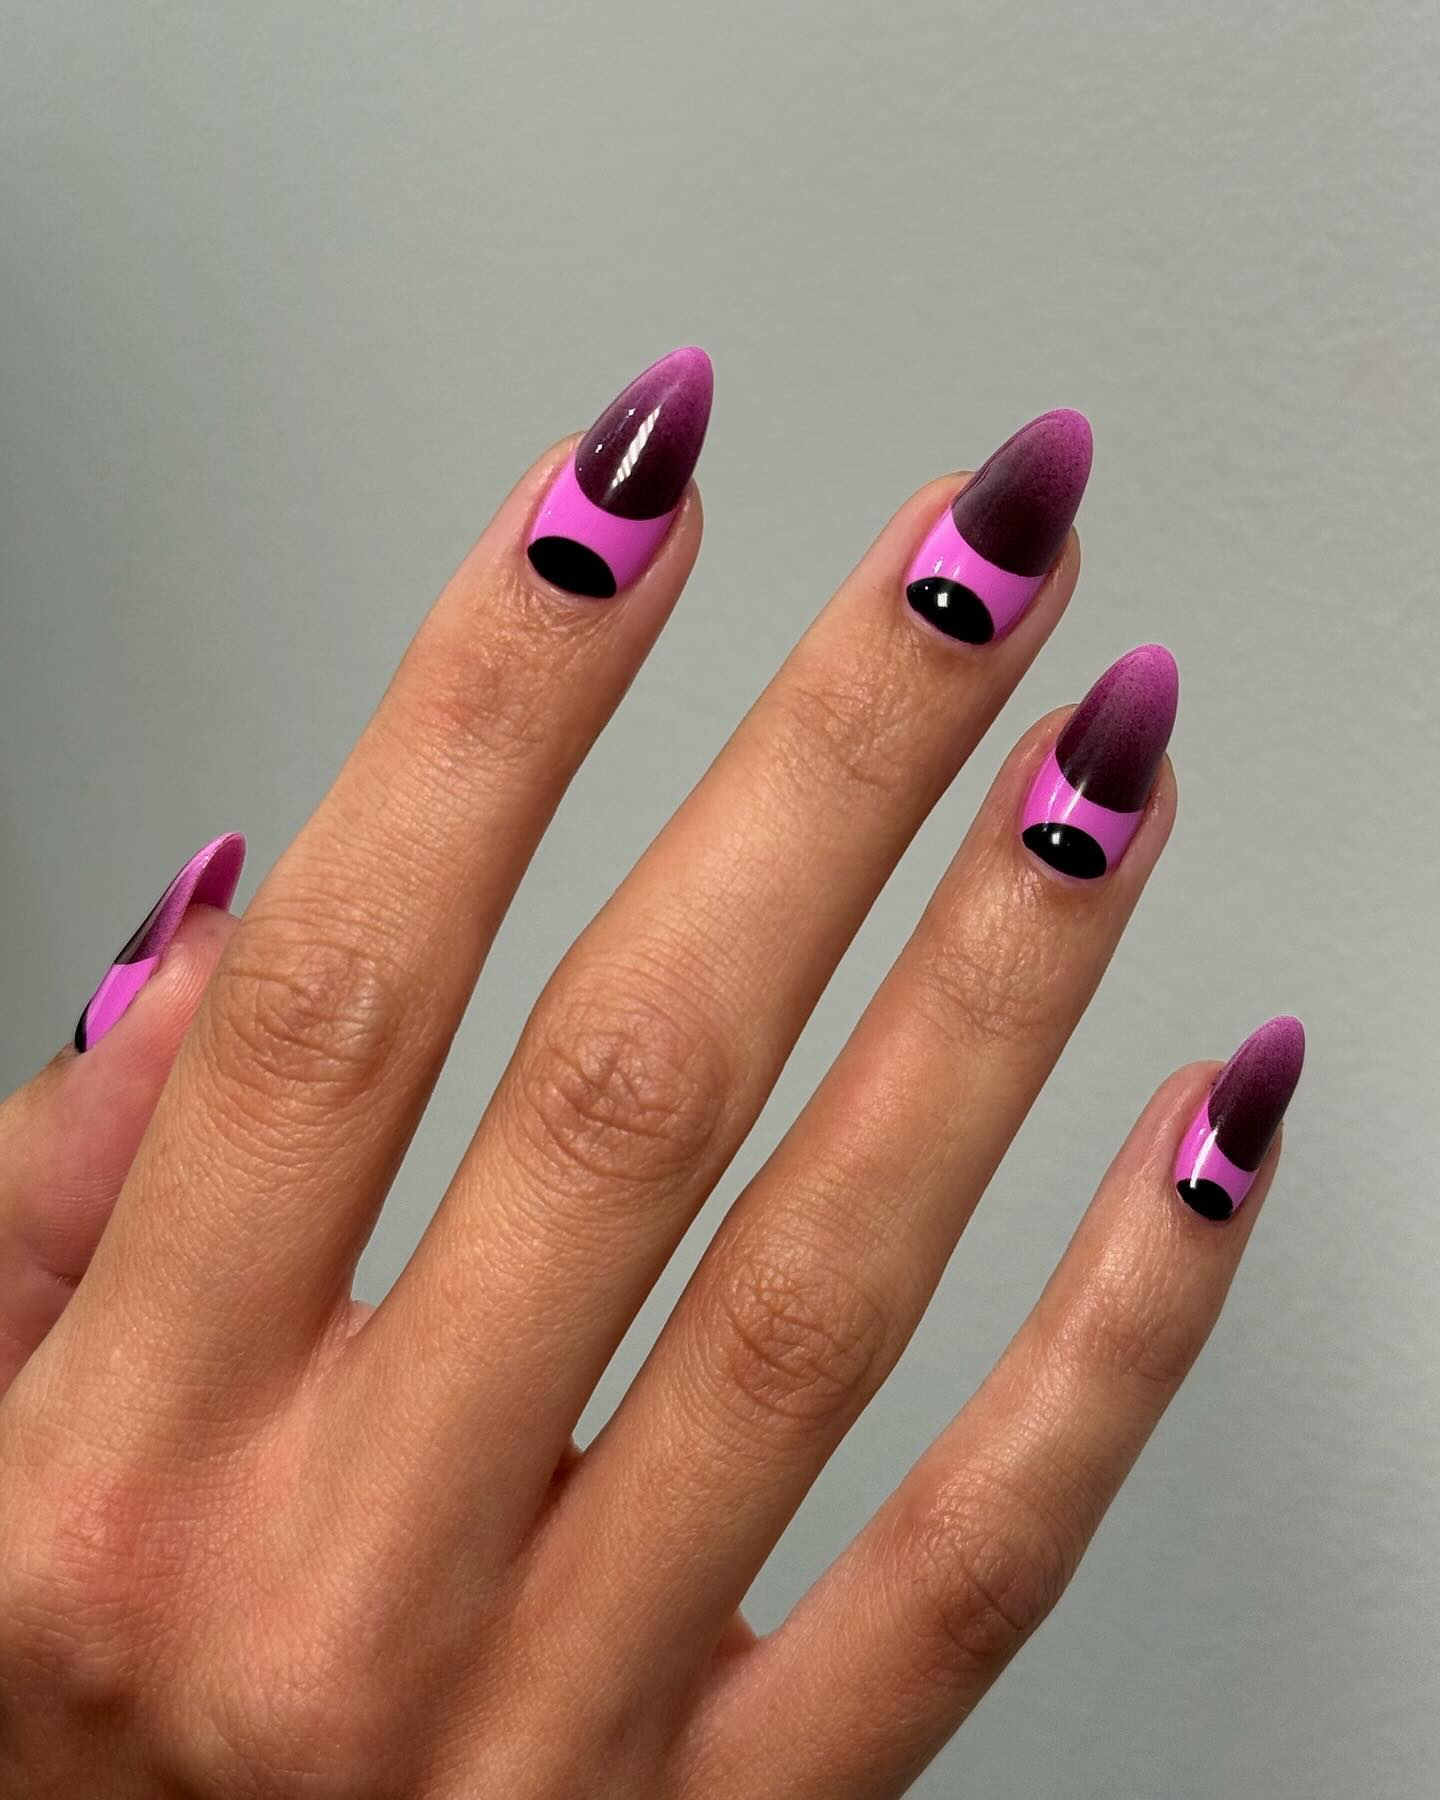
source@nailartbyqueenie
Color blocking is an easy yet bold way to add dimension to your nails. Instead of painting your nails a single shade, divide them into sections and use different colors for each part. A simple way to do this is by painting half of your nail in one color and the other half in another for a clean, modern contrast. You can also add a third shade for an even more creative look. Using a thin brush or nail tape will help you achieve crisp, defined lines.
16. DIY Newspaper Nails
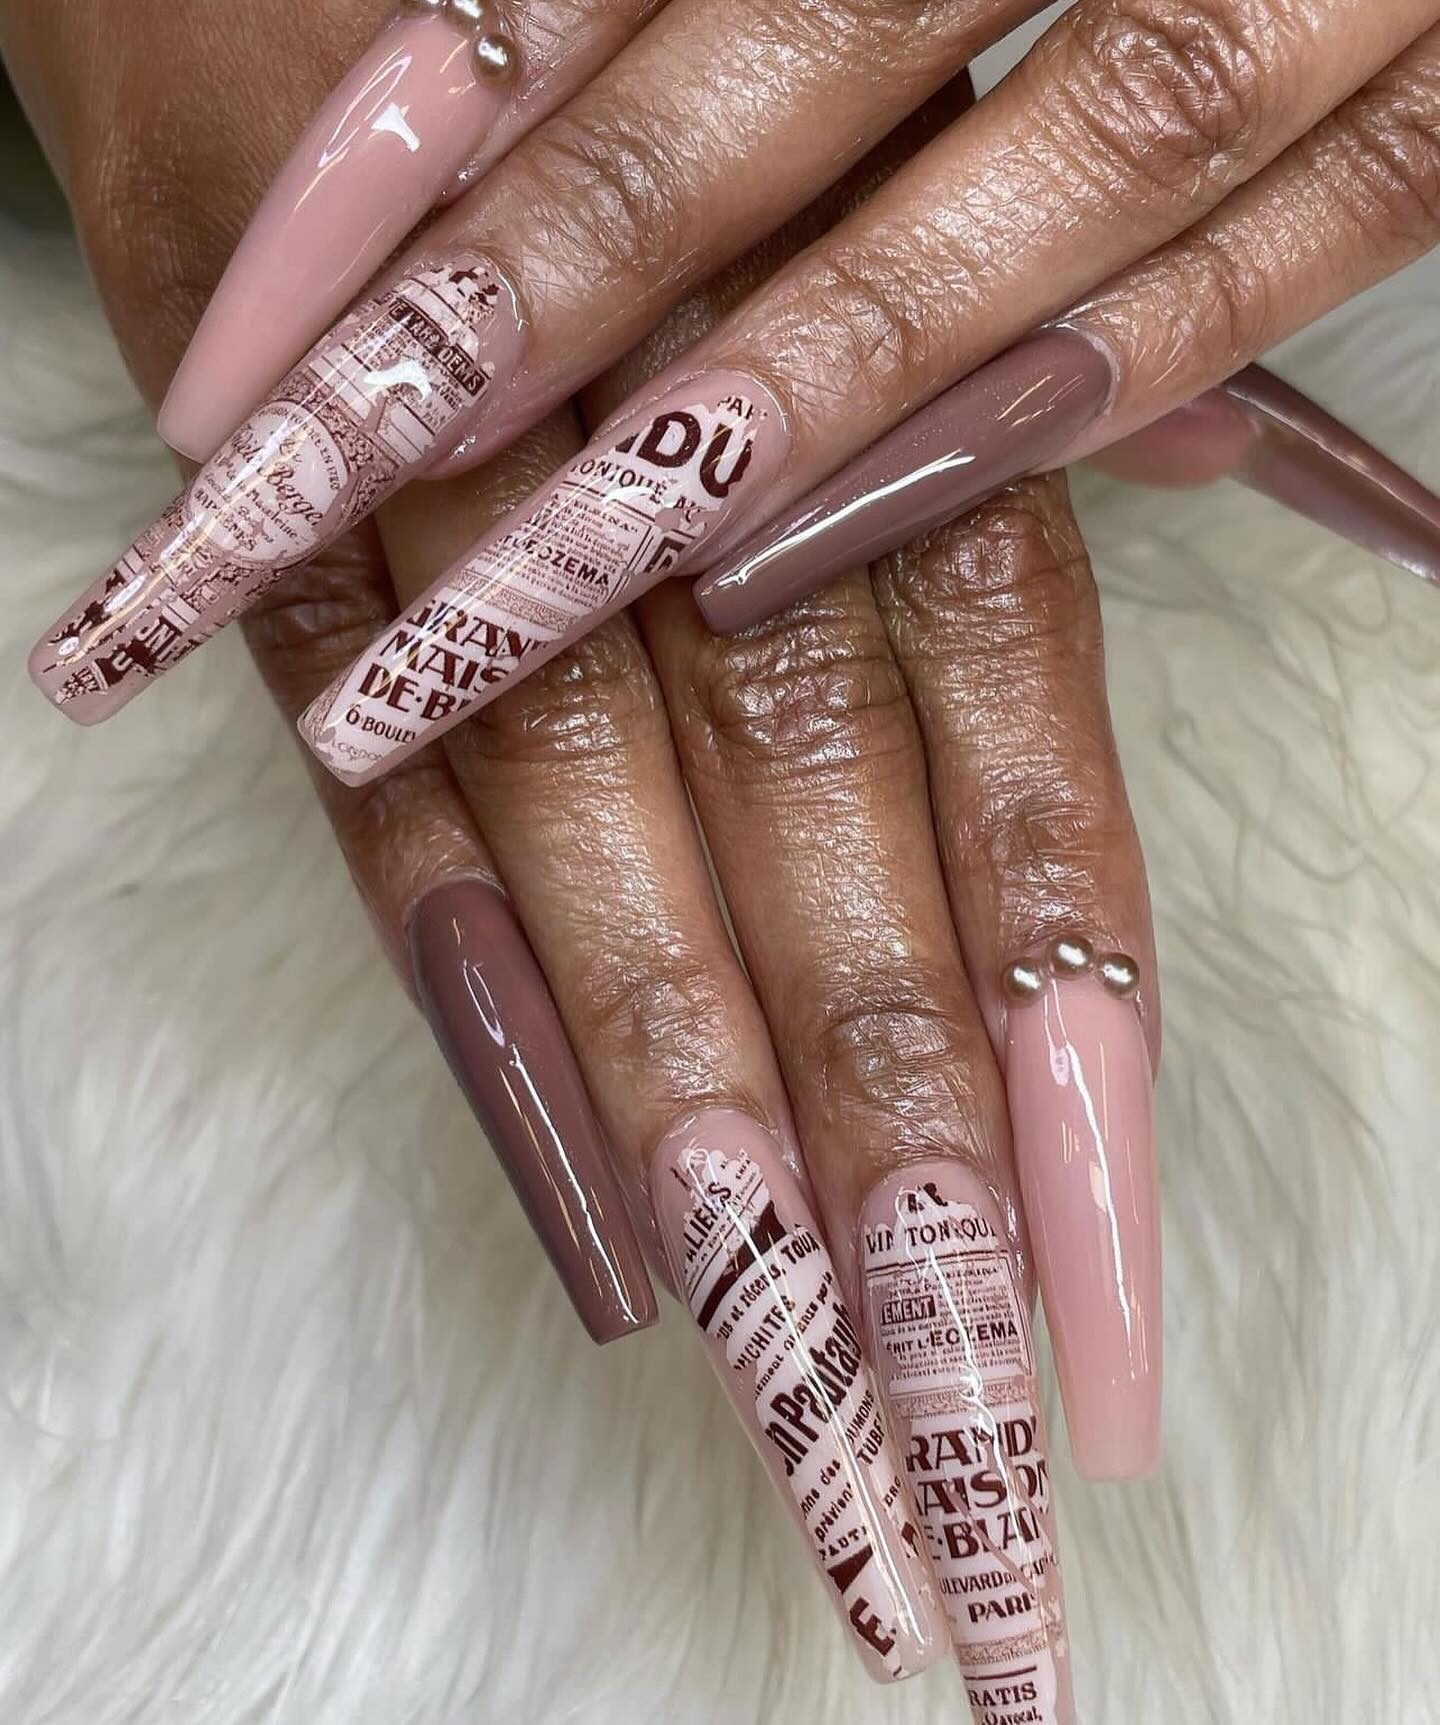
source@blackgirlsdonails
Newspaper nails are a unique and creative way to add text to your manicure. To achieve this look, start with a light-colored base coat (such as white or pale gray). Once dry, dip your nails in rubbing alcohol and press a small piece of newspaper onto your nails, holding it for a few seconds before peeling it off. The ink will transfer, leaving you with a stylish, printed effect. Finish with a clear top coat to seal the design. This technique is great for book lovers or anyone who loves a vintage-inspired aesthetic.
17. Holographic Glitter Nails
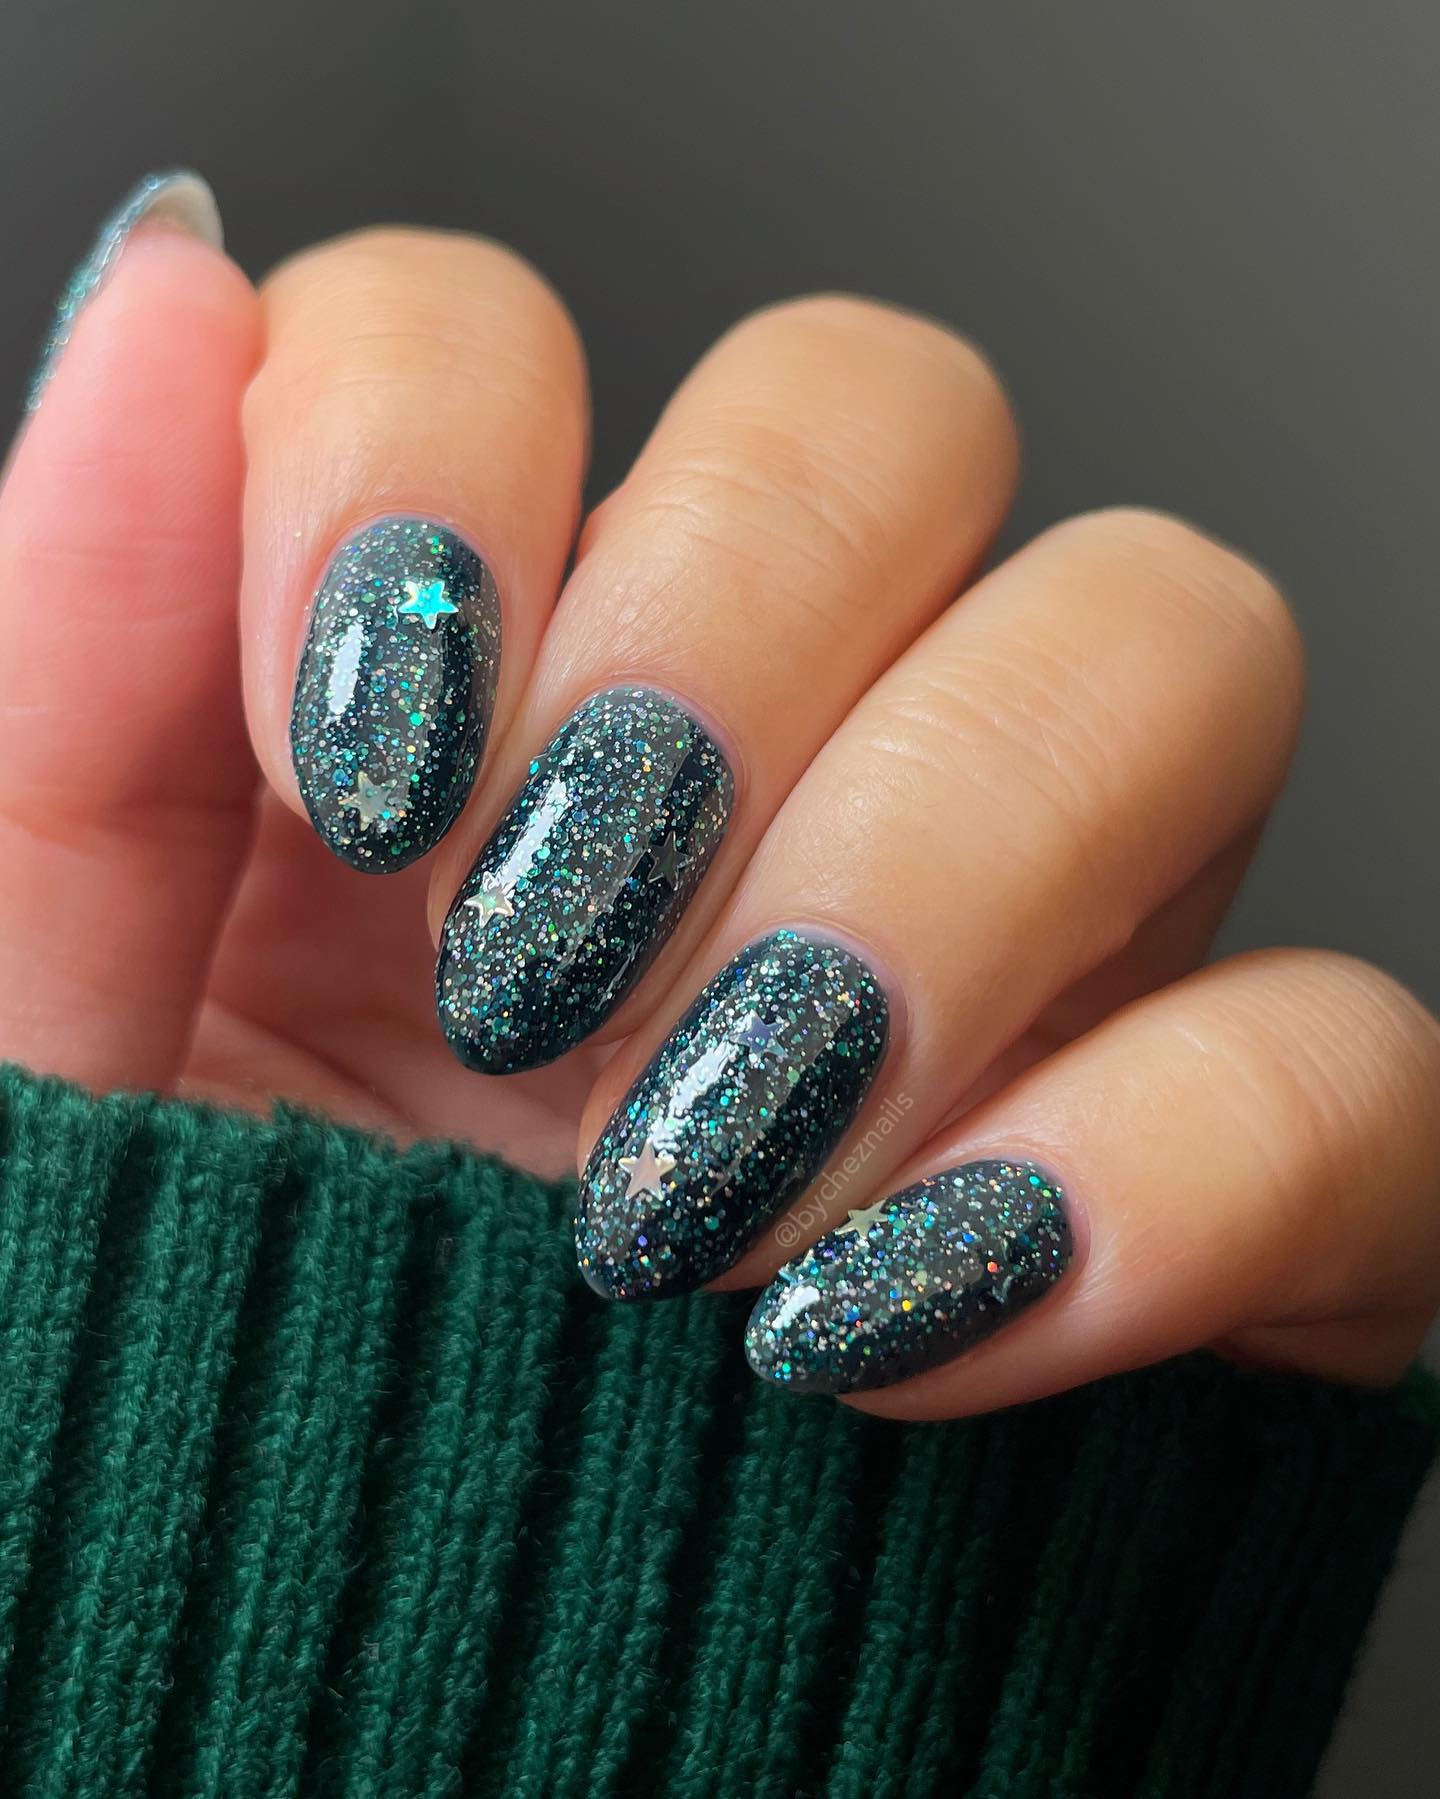
source@bycheznails
If you love all things shiny and eye-catching, holographic glitter nails are for you. Holo glitter reflects light beautifully, giving your nails a multidimensional sparkle. You can apply holographic polish all over your nails for a dazzling effect or use it as an accent on just one or two nails. Another fun technique is to sprinkle loose holographic powder over a gel base and seal it with a glossy top coat. This look is perfect for parties, festivals, or whenever you want your nails to stand out.
18. Cute Heart Nail Design

source@bycheznails
Heart designs are adorable and surprisingly easy to create. Using a dotting tool or the tip of a bobby pin, place two small dots close together, then use a fine brush or toothpick to connect them into a heart shape. You can go for a subtle look with tiny hearts on each nail or make a statement with bold, oversized hearts. Red, pink, and white are classic color choices, but pastel shades or even black hearts can create a unique twist.
19. Drip Nails for a Playful Look
source@_dripnails_
Drip nails mimic the effect of paint dripping down your nails, creating a fun and artsy design. To achieve this, use a dotting tool to place large dots near the cuticle, then drag the polish downward to form a melting effect. You can create classic ice cream drips, blood drips for a Halloween vibe, or neon drips for a funky, colorful style. A high-shine top coat enhances the 3D illusion and makes the drips pop.
20. Cow Print Nail Art
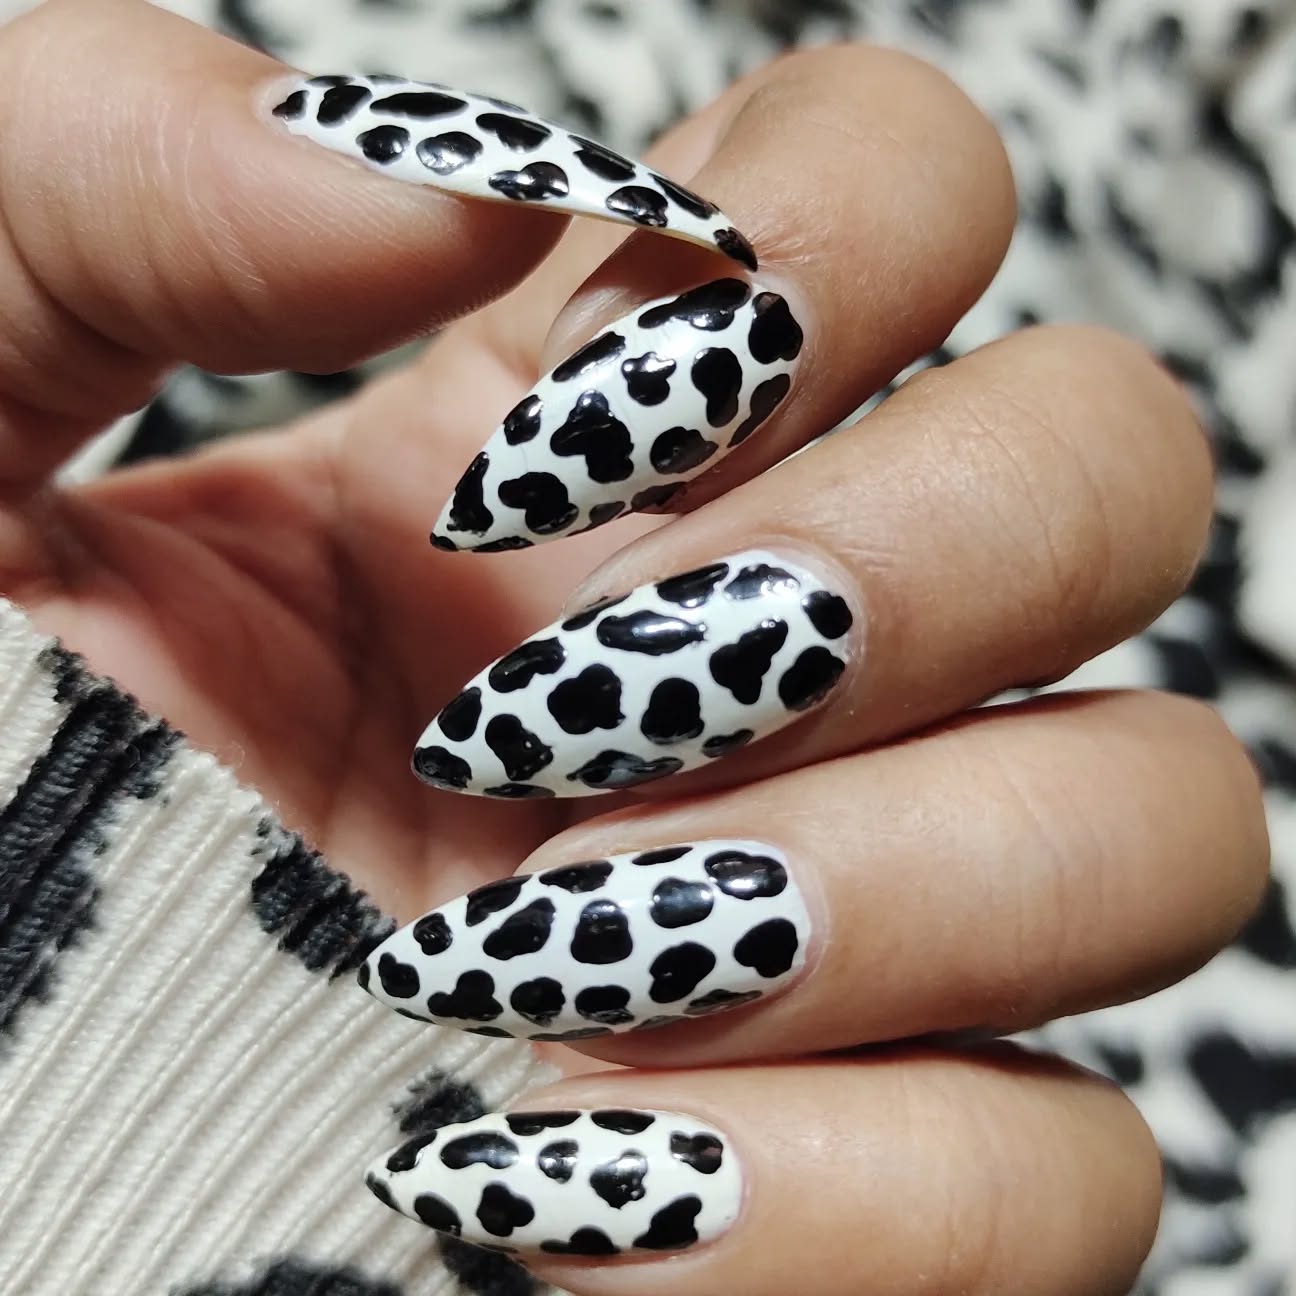
source@nails_byritika
Animal prints are trending in the fashion world, and cow print nails have quickly become a favorite. The black-and-white spotted pattern is fun, playful, and easy to recreate at home. Start with a white base, then use a dotting tool or nail brush to create irregular black spots. Unlike leopard prints, cow print patterns don’t have to be perfectly shaped, which makes this an ideal design for beginners. For an extra twist, try a brown-and-white version for a more subtle, neutral look.
21. Galaxy-Inspired Nails
source@nailcon
Galaxy nails look complex, but they’re quite simple with the right technique. Using a makeup sponge, dab dark blue, purple, and black polish onto your nails in a random pattern to create a cosmic effect. Add tiny white dots or star stickers for extra detail. A holographic top coat or shimmer polish can give your galaxy nails an otherworldly sparkle. This design is perfect for stargazers and those who love celestial aesthetics.
22. Speckled Egg Effect
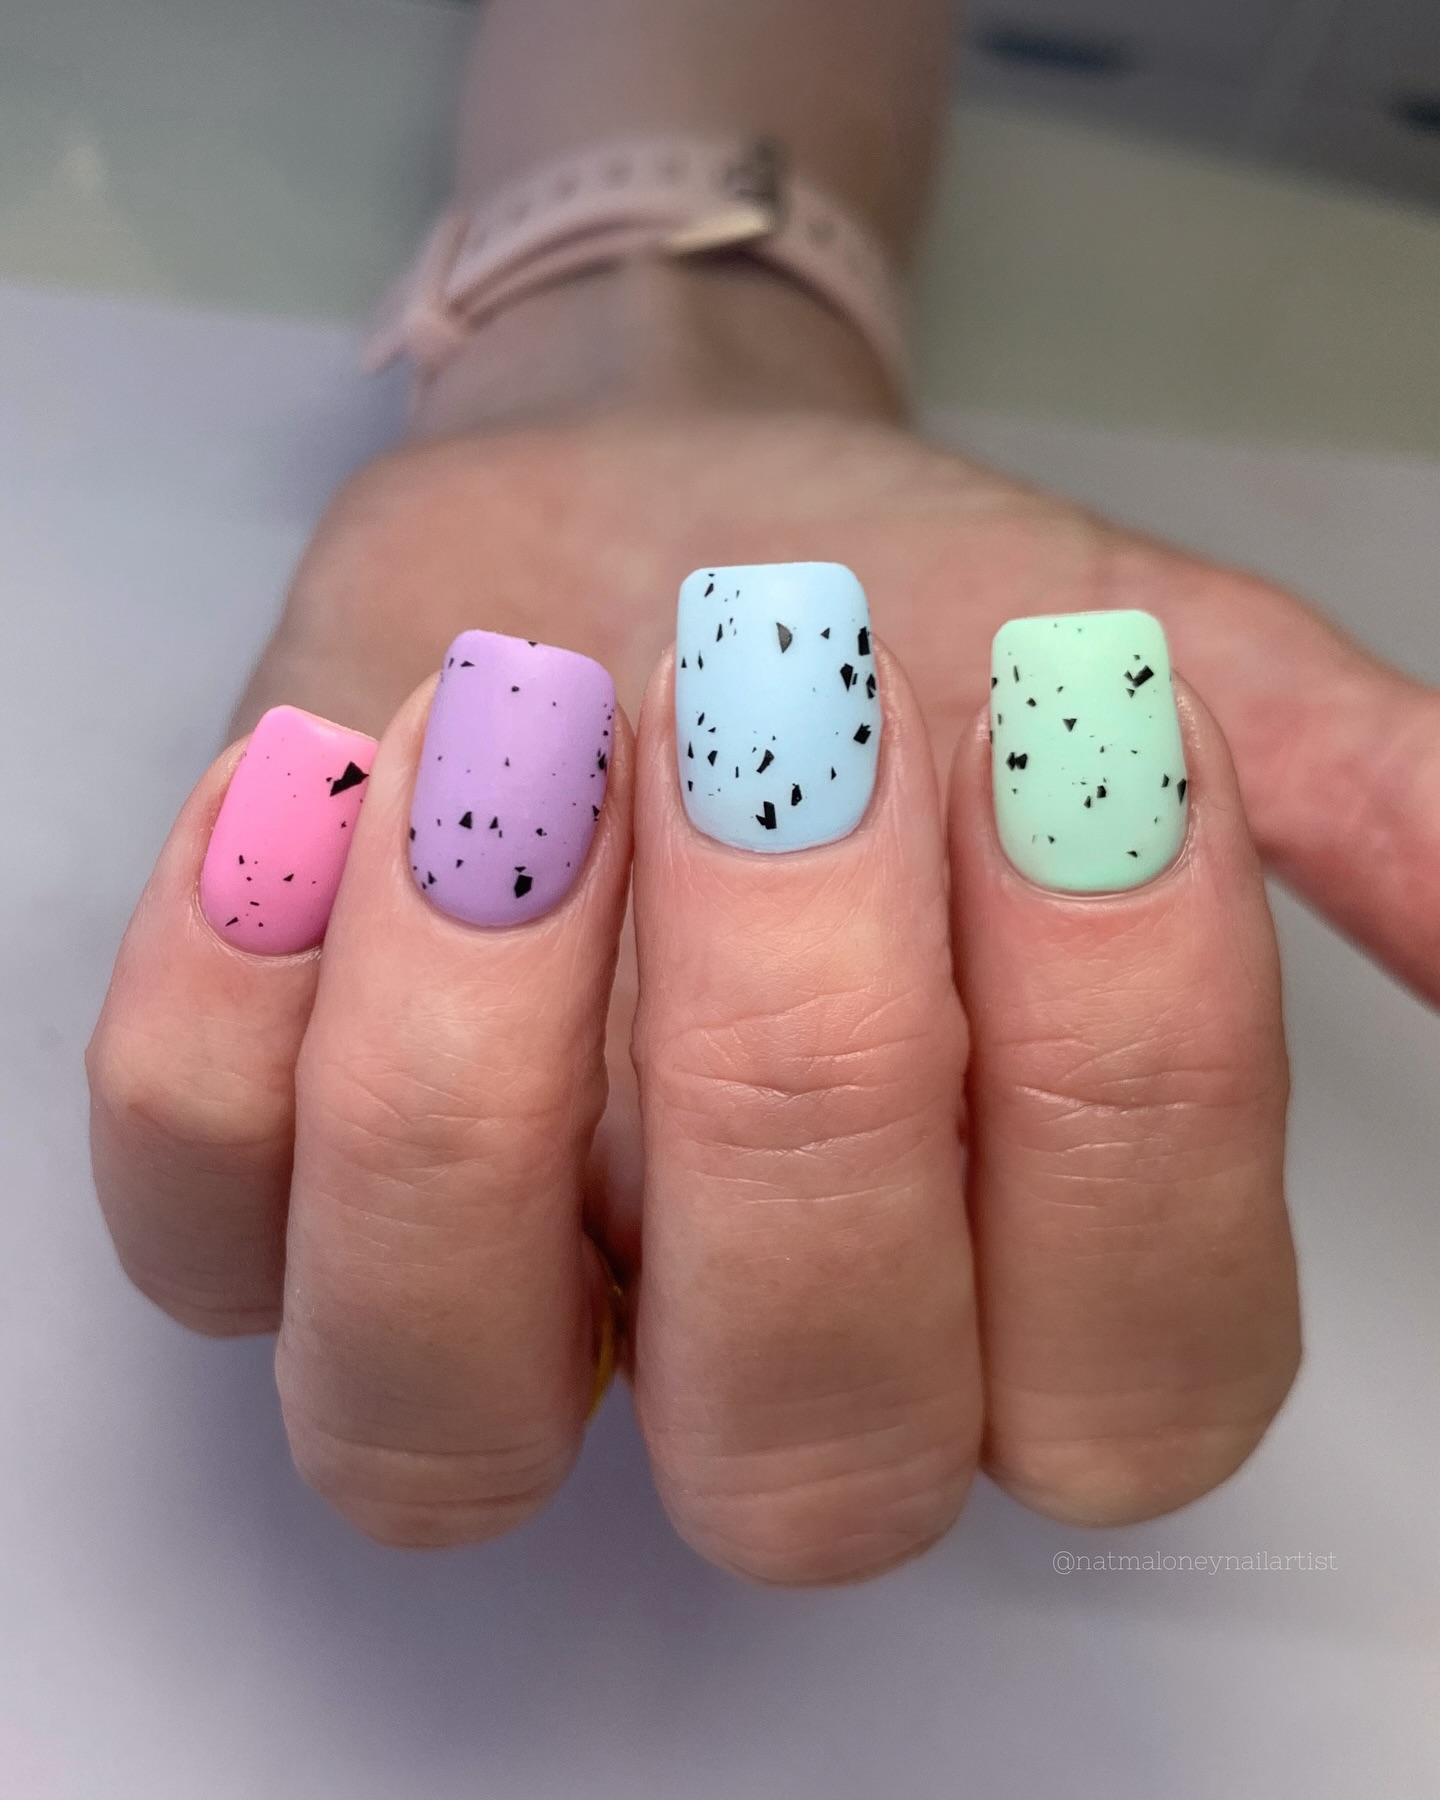
source@natmaloneynailartist
For a cute and natural-looking design, try the speckled egg effect. This style is inspired by bird eggs and works best with pastel base colors like baby blue, soft yellow, or mint green. Use a fine-tipped brush or toothbrush to lightly splatter black or brown polish over your nails, creating a speckled texture. It’s a perfect springtime manicure and pairs well with matte finishes for a more realistic effect.
23. Neon French Tips
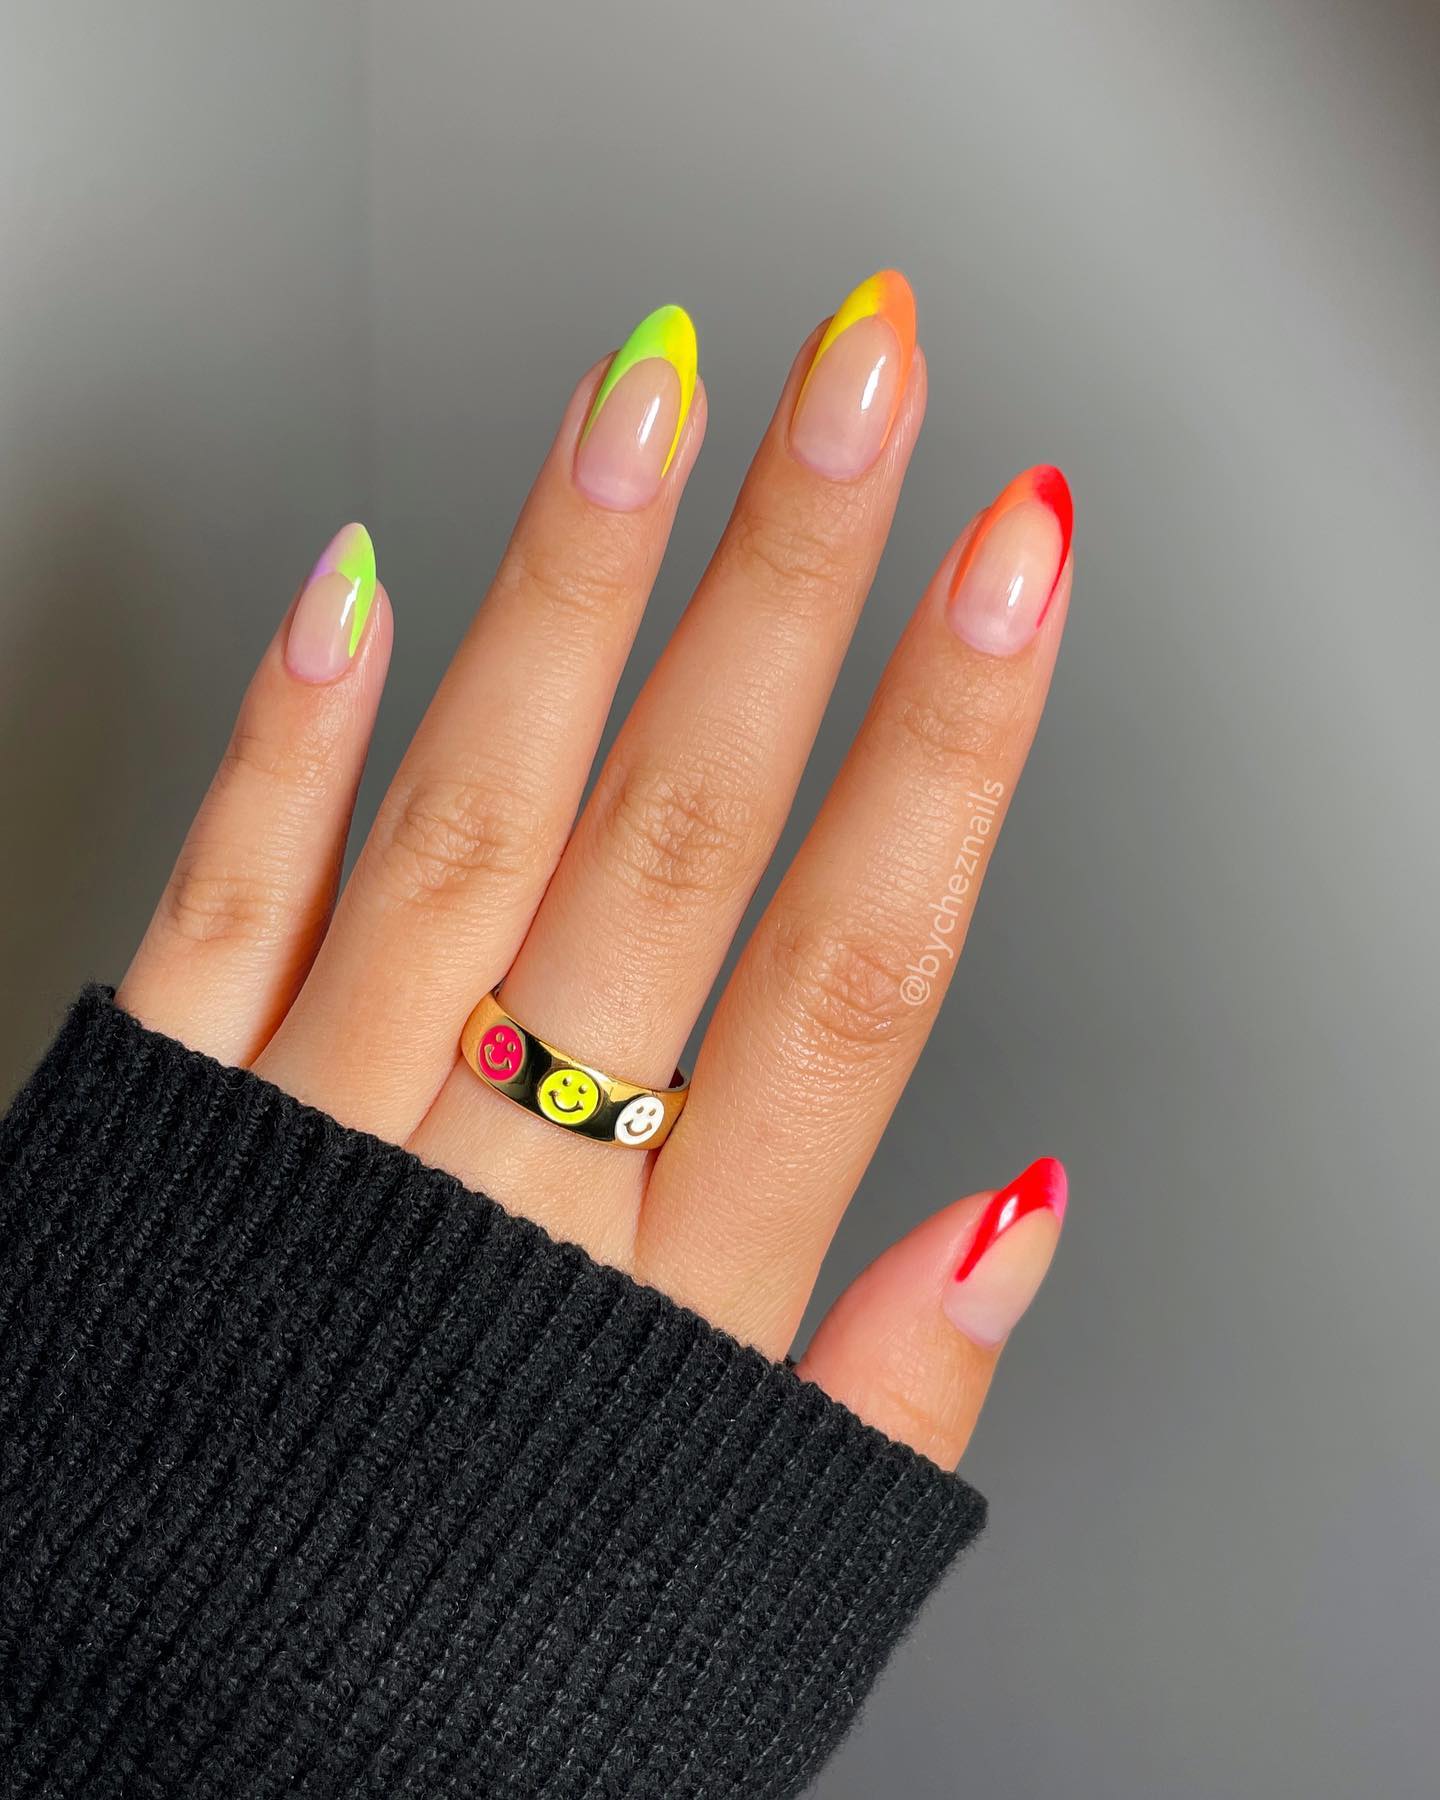
source@bycheznails
French tips get a vibrant makeover with neon colors. Instead of the classic white tip, use bright shades like electric pink, lime green, or vivid blue. This design is great for summer and adds a pop of fun to your nails without being overwhelming. For an extra bold look, combine two neon colors for a two-tone tip. A clear or nude base helps the neon hues stand out even more.
24. Gold Foil Half Moons
source@honeymoonnail
Half-moon nails are a timeless design, and adding gold foil makes them even more glamorous. To achieve this look, leave the base of your nails bare or painted in a neutral shade, then apply gold foil in a half-moon shape near the cuticle. This design works beautifully with sheer polishes or dark, dramatic colors like deep green or burgundy. A glossy top coat will keep the foil in place while enhancing the metallic shine.
25. Seasonal Nail Art Inspiration
source@nailsbytrinnie
One of the best ways to keep your nail art fresh is by switching designs based on the seasons. Try snowflake patterns for winter, floral designs for spring, beachy waves for summer, and pumpkin or leaf motifs for fall. Investing in seasonal stamping plates or nail stickers makes it easy to update your manicure for any occasion. Whether you’re celebrating holidays, festivals, or simply embracing the changing weather, seasonal nail art lets you have fun with your nails all year round.